When I started this blog I just would share with you guys my passion for creativity and everything handmade. Tutorials are sometimes less important than the creative idea itself (just think about a flowers garland, for example), but others they may require skills that not everyone has. I’m far from being a DIY omniscient but, during the last years, I’ve learnt a bit and built my personal “maker’s skills and tricks experience”, always evolving. This is why I think it’s the right moment to start a new section on Francine’s Place Blog: the CRAFT SKILLS. A series of posts where you’ll find tips and tutorials for the DIY skills you need for a project and everyting connected to creative activities and new skills to learn. Ready to start? I totally am! // Quando ho dato il via a questo blog volevo semplicemente condividere con voi la mia passione per la creatività e per le cose handmade. A volte i tutorial sono molto meno importanti dell’idea creativa in sé (pensate ad una ghirlanda di fiori, ad esempio), altre richiedono capacità che non tutti hanno. Sono ben lontana dall’essere un’esperta di fai da te, ma negli ultimi anni ho imparato un po’ e ho accresciuto la mia esperienza nel campo, sempre in evoluzione. Ecco perché credo sia il momento giusto per iniziare una nuova sezione su Francine’s Place Blog: CRAFT SKILLS. Una serie di post con spiegazioni su ciò che bisogna saper fare per realizzare un progetto fai da te e ogni cosa connessa alla creatività e a nuove capacità. Voi siete pronte? Io assolutamente!
Today I want to share with you something that it seems to be, for some of you, an unfriendly topic when it comes to making: hand sewing! When I share sewing projects I often read “I’d like but I can’t”, so today we see together how to make the starting and closing knots. Let’s go!
//
Oggi voglio condividere un argomento che mi pare sia spinoso per alcune di voi quando si tratta di fai da te: il cucito a mano! Quando pubblico dei progetti di cucito, spesso leggo “mi piacerebbe ma non sono capace”, bene oggi vediamo come fare i nodi di apertura e chiusura quando si cuce a mano. Iniziamo!
***
You need // Vi occorre:
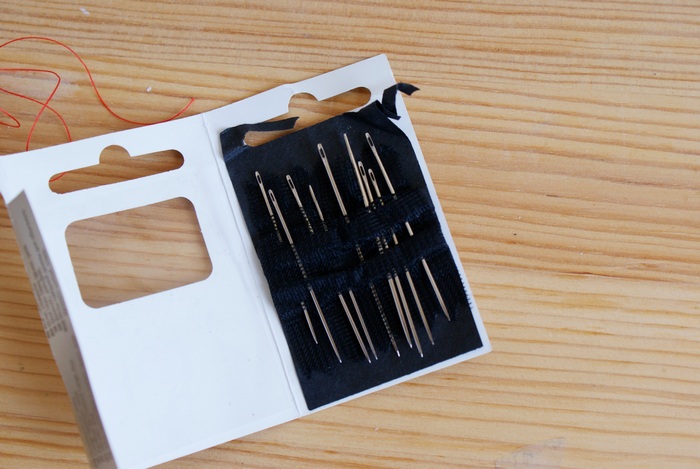
- Needle for hand sewing: measures usually go from 1 (thick and long) to 10
(thin and short). It depends on what you have to sew; thin if the fabric
is fine (like silk) and you have to do a meticulous work (hem or little details), thick
if you are sewing, for example, a curtain or cross-stitching.
I usually go for 3 or 4 and if it’s too thin I change measure until I feel comfy. //
Ago da ricamo: le misure vanno da 1 (spesso e lungo)
a 10 (sottile e corto). Dipende dal tipo di lavoro che dovete fare: sottile per tessuti
pregiati (tipo la seta) e se dovete fare un lavoro di fino (orlo o piccoli dettagli),
spesso se dovete, ad esempio, cucire una tenda o fare punto croce.
Io di solito vado per il 3 o 4 e se è troppo sottile cambio misura finché non sono comoda. - Thread: there are cotton, silk, nylon, raion, polyester and more types.
Synthetic is sturdy and cheap, but I always prefer the cotton one (silk only
if sewing silk or whool fabrics and for sartorial works). // Filo: ci sono
fili di cotone, seta, nylon, raion, poliestere, e molti altri. Il sintetico
è robusto ed economico, ma io preferisco sempre il cotone (quello di seta
solo se si usano tessuti di seta o lana e per lavori sartoriali). - A piece of fabric, like a cotton hanky, that you can use for practice. //
Un pezzo di tessuto, tipo un fazzoletto di cotone, con cui potete far pratica. - Scissors. // Forbici.

How to // Come procedere:
1)
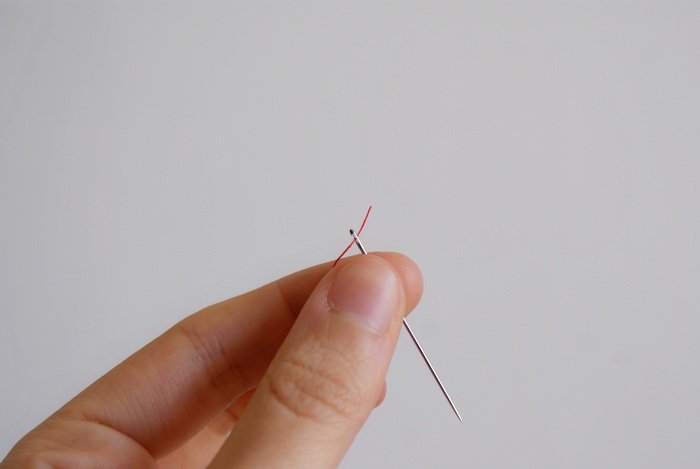
Cut about 20 cm (7,5 in) of thread, make one extremity pass through needle’s eye andknot extremities together. I prefer double thread cause it’s stronger, but you’re free to use single thread, you just have to make a know to one extremity and make the other pass through the eye for about 5 cm (1,9 in). // Tagliate circa 20 cm di filo, fate passare un’estremità nella cruna dell’ago, poi annodate insieme le due estremità. Io preferisco il filo doppio perché è più robusto, ma voi siete libere di usare quello singolo, dovete semplicemente fare il nodo ad una estremità sola e far passare l’altra nella cruna, per circa 5 cm.

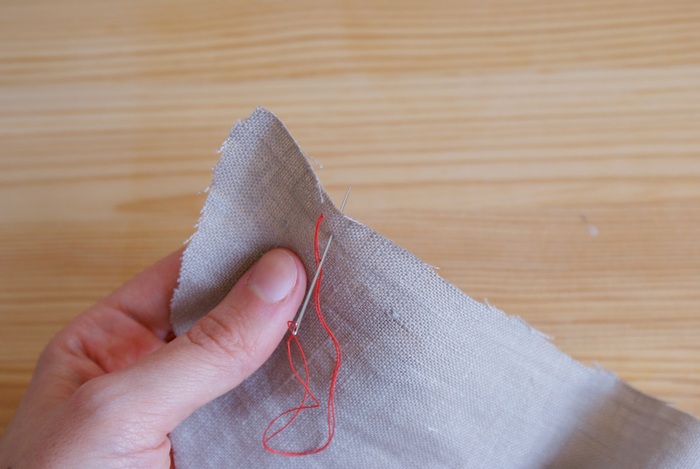
2)
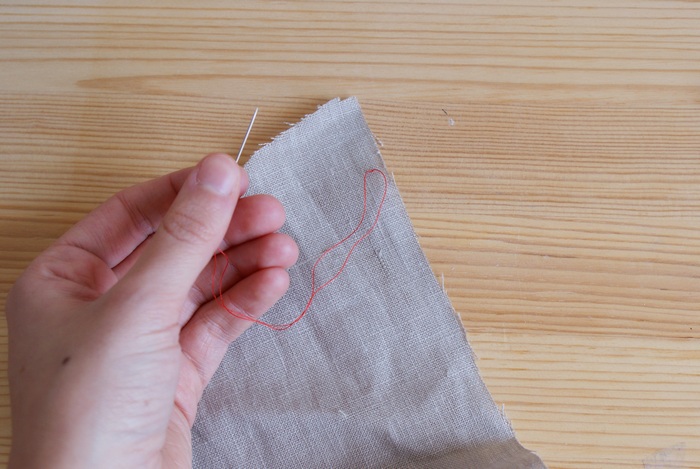
Now take the fabric and insert the thread from the reverse side: the knot you made before will stop on the reverse and you won’t see anything on the front. Sometimes it may happen you’ll need to make double, triple knot to make it bigger and not make it pass throught the fabric with the needle. // Ora prendete il tessuto ed inserite l’ago dal rovescio del tessuto: il nodo che avete fatto si fermerà sul retro e davanti non vedrete nulla. A volte dovrete fare un doppio, triplo nodo per renderlo più grosso e far sì che non passi attraverso il tessuto insieme all’ago.


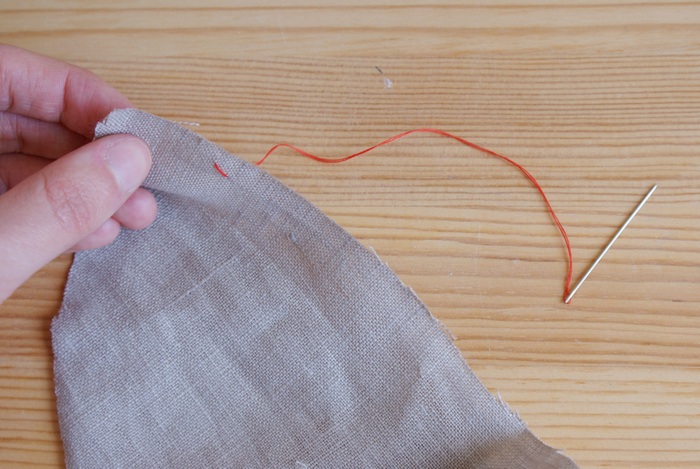
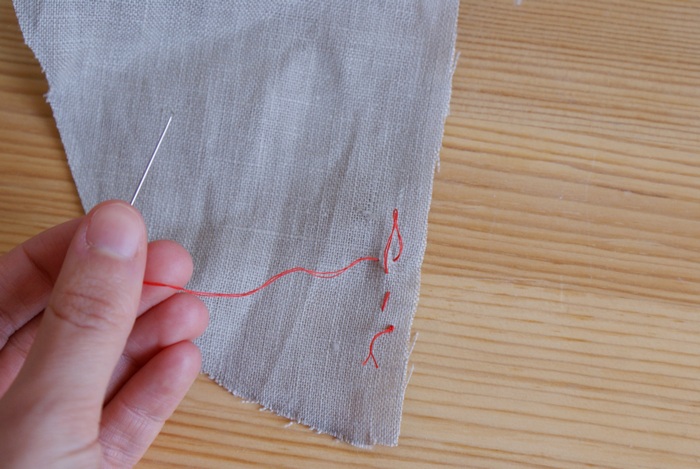
3)
Now it’s time to sew! We’ll see the types of stitches another time (it’s already getting so long here), so you just need to make four stitches making the needle pass front-back-front-back through the fabric and stop. // Ora è tempo di cucire! Vedremo i vari tipi di punto un’altra volta (sta già diventando
abbastanza lunga la questione), quindi fate giusto quattro punti facendo passare l’ago fronte-retro-fronte-retro e fermandovi.

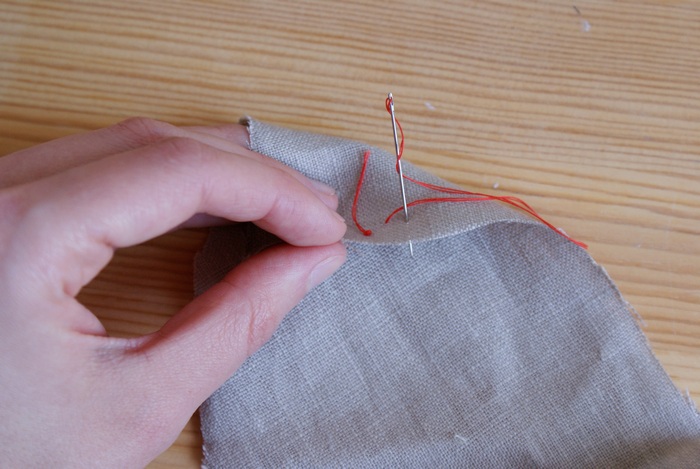


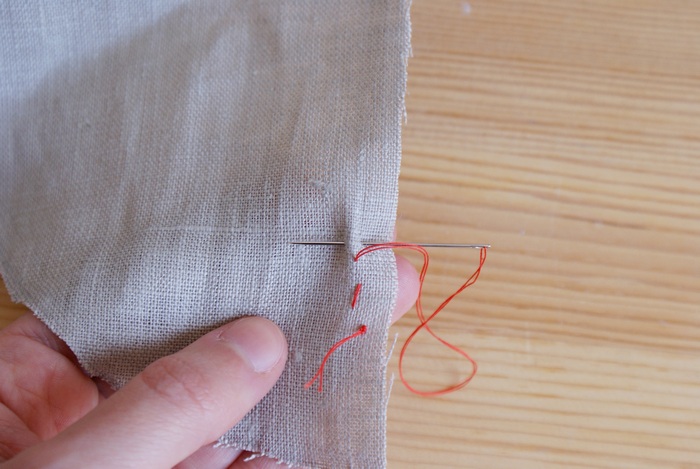
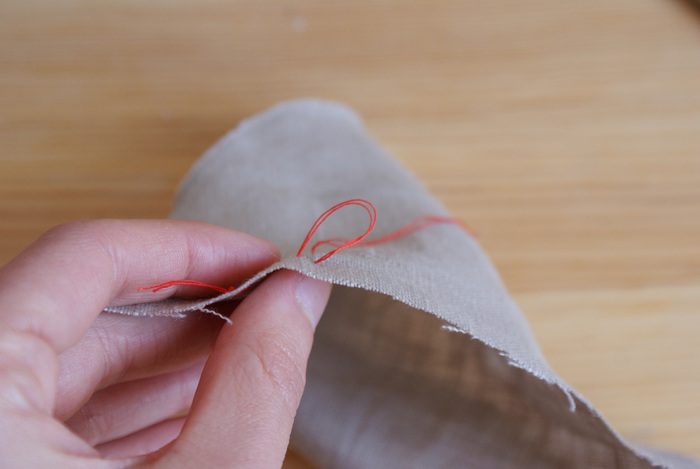
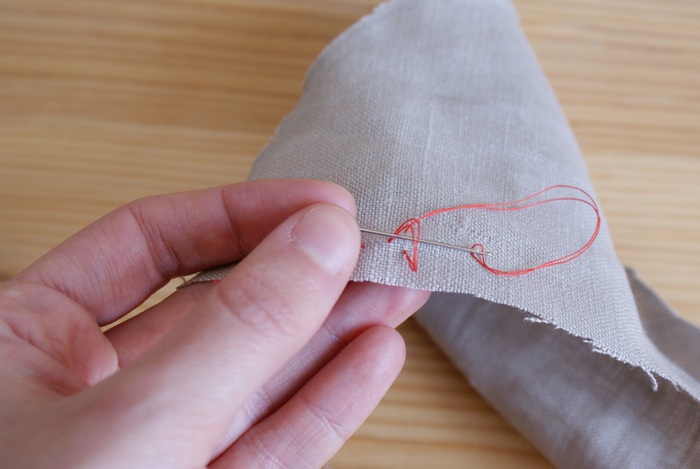
4)
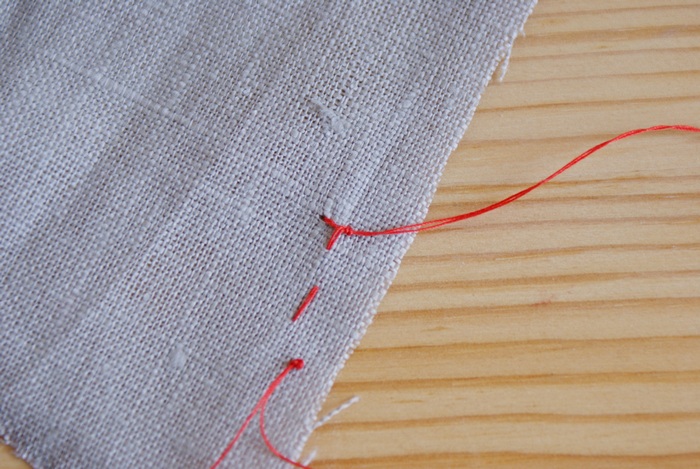
Again on the back side, you’ll make the closing knot. Some make it as the first one, but I prefer this version that my grandmas taught me (and grandmas know it well). Well, make the needle pass through the fabric but horizontally (see picture) and pull softly, until you create a little ring. Now make the needle pass throught the ring two times from the same side, then pull. I usually do this 2 times (2 knots) and also even after the opening knot, to make it super secure. Cut the excess of thread and you’re done! // Di nuovo sul retro, farete il nodo di chiusura. Alcune lo fanno come il primo, ma io preferisco questa versione che mi hanno insegnato le mie nonne (e le nonne la sanno lunga). Bene, fate passare lago attraverso il tessuto, ma questa volta in orizzontale e tirate delicatamente, finché non create un piccolo anello. Fate passare l’ago attraverso l’anellino due volte sempre nella stessa direzione, poi tirate. Io di solito ripeto ciò due volte (faccio quindi 2 nodi) e lo faccio anche dopo il nodo iniziale, per rendere il tutto più robusto. Tagliate l’eccesso di filo e avete fatto!


Well, now you know how to make the knots while hand sewing. If you already knew that, let me know if you do the same! Can’t wait to know if you like the idea of this new series of posts! Let me know! // Bene, ora sapete fare i nodi per il cucito a mano. Se già lo sapevate, sono curiosa di sapere se li fate come me! Non vedo l’ora di sapere se vi piace l’idea di questa nuova serie di post, fatemi sapere!
xx


