
Cozy sweaters alert! Hands up if you love Fall and its relaxed atmosphere!
I am always so excited to wear again warm cozy clothes to stay wrapped in all day. And you?
//
Attenzione, maglioncini coccolosi in arrivo! Alzate la mano se anche voi adorate l’Autunno e l’atmosfera rilassata!
Io sono sempre super contenta di indossare nuovamente abiti caldi e comodi tutto il giorno. E voi?
There is something my closet it never full of: sweaters. Yes, I have this thing with soft and warm sweaters and they are kind of never enough to me. Buuut, since DIY is better than buy (especially when you are on a budget due to a renovation) this year I decided to make and share with you girlsss few cute (okay, super cute!) ideas to restyle your old sweaters and transform them into lovely, cozy ones. Here you find the first one, something ridiculously easy to make but oh-so worth it! Ready?
//
Se c’è qualcosa di cui il mio armadio non è mai pieno sono i golf. Già, credo di esserne tipo ossessionata, non sono mai abbastanza per me. Maaa, dato che creare è meglio che acquistare (specialmente quando hai esaurito le risorse con la ristrutturazione), quest’anno ho deciso di realizzare e condividere con voi fanciulle alcune idee DIY per rinnovare i vostri vecchi golfini e trasformarli in adorabili e coccolosi maglioni. Qui trovate il primo, così facile da fare che ne varrà assolutamente la pena! Pronte?
***
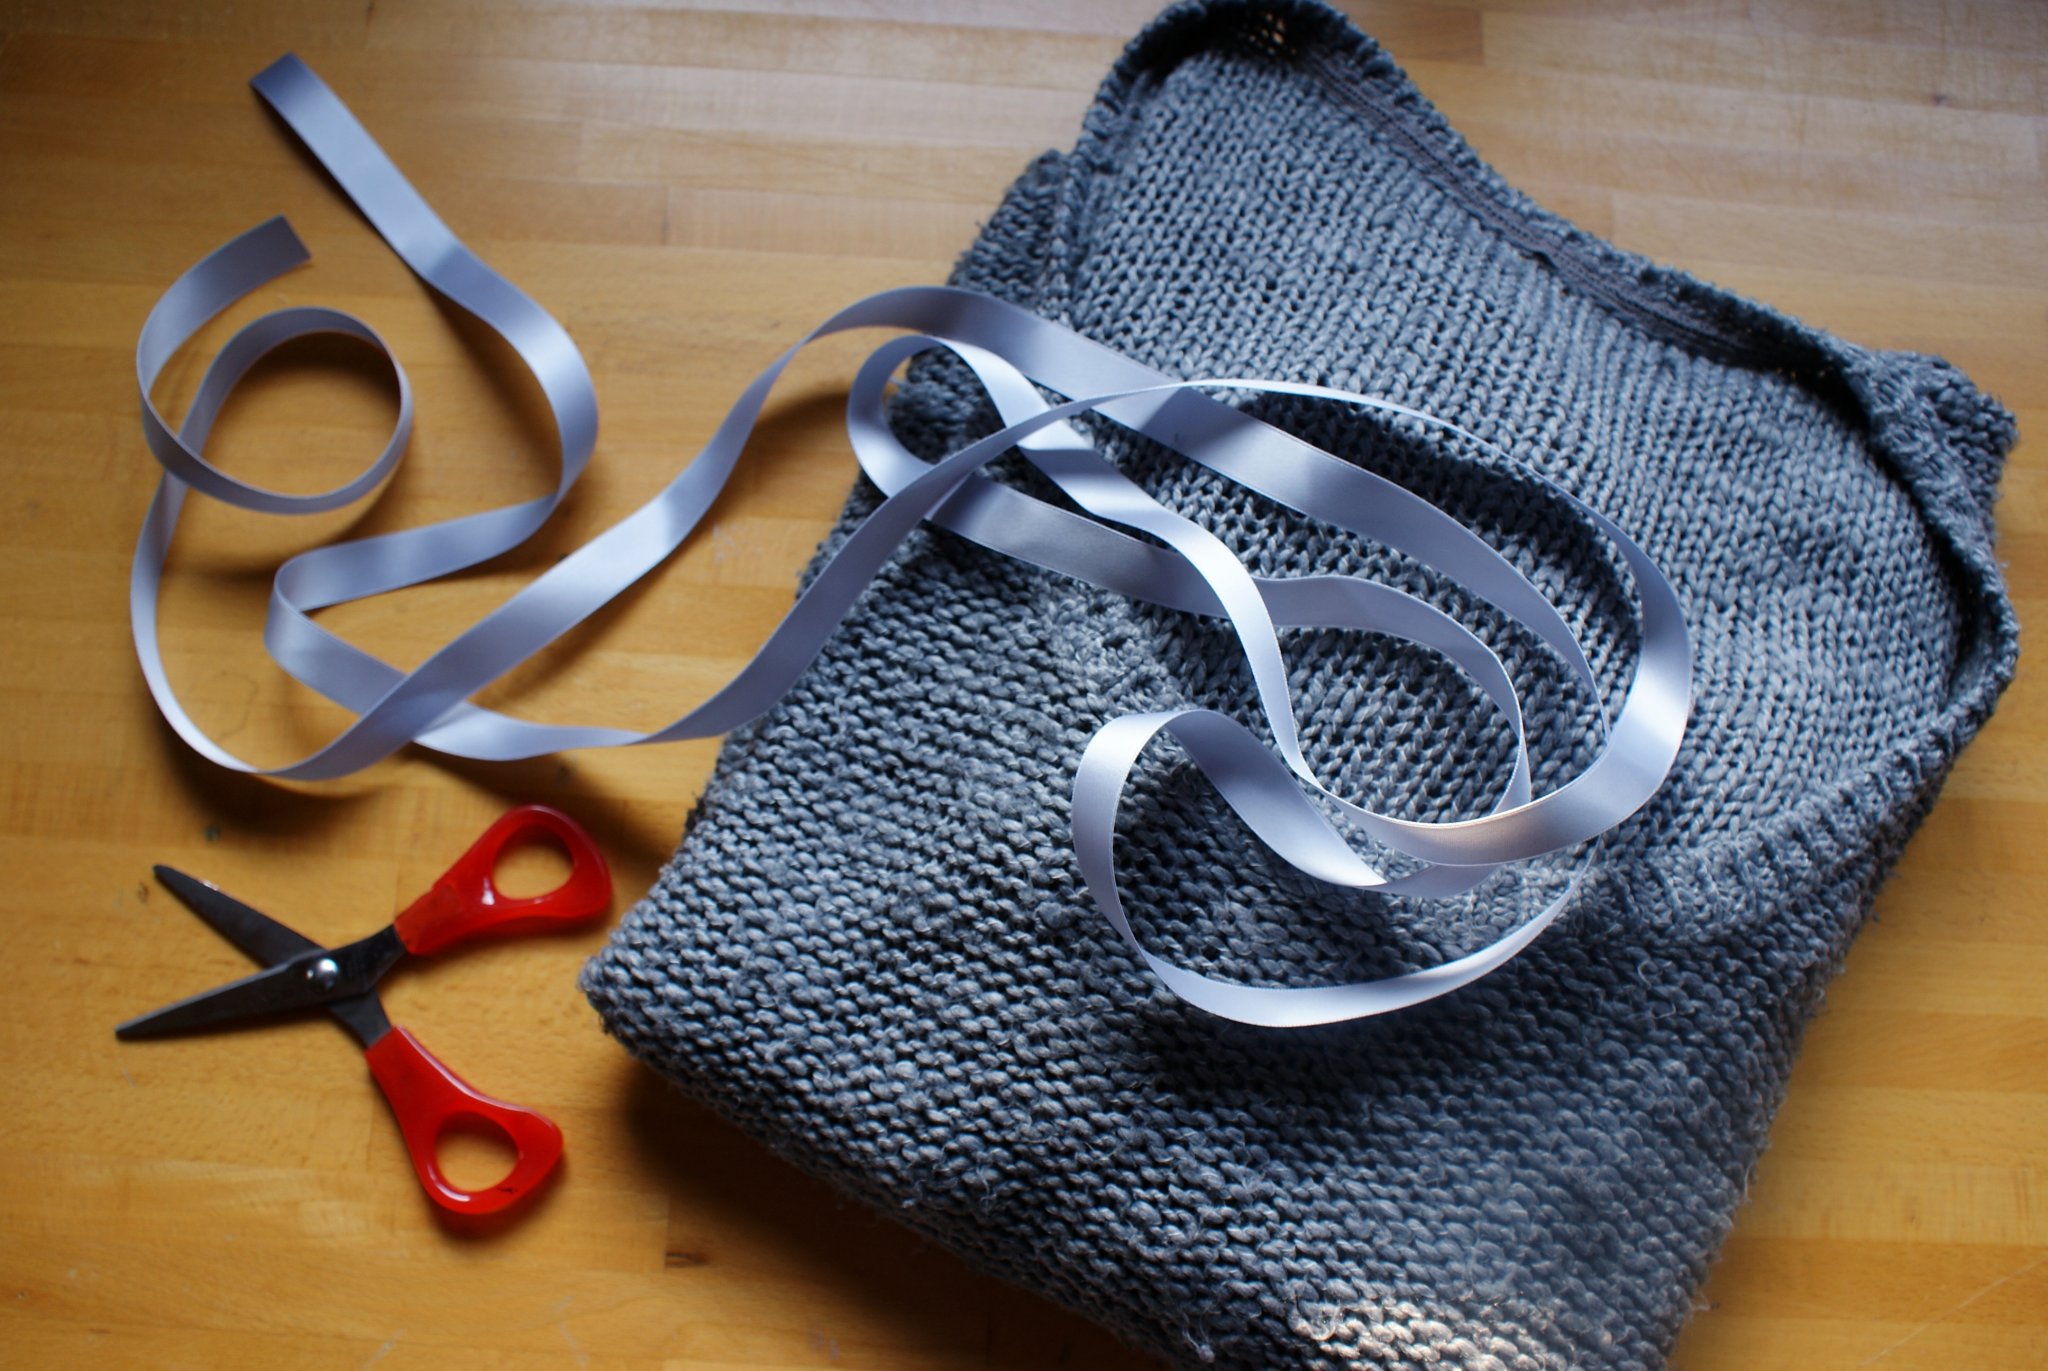
You need // Vi occorre:
- an old (wide woven) sweater // un vecchio maglione a trama larga
- about 4 mt (157 in.) of ribbon // circa 4 mt di nastro
- scissors // forbici
How to // Come procedere:
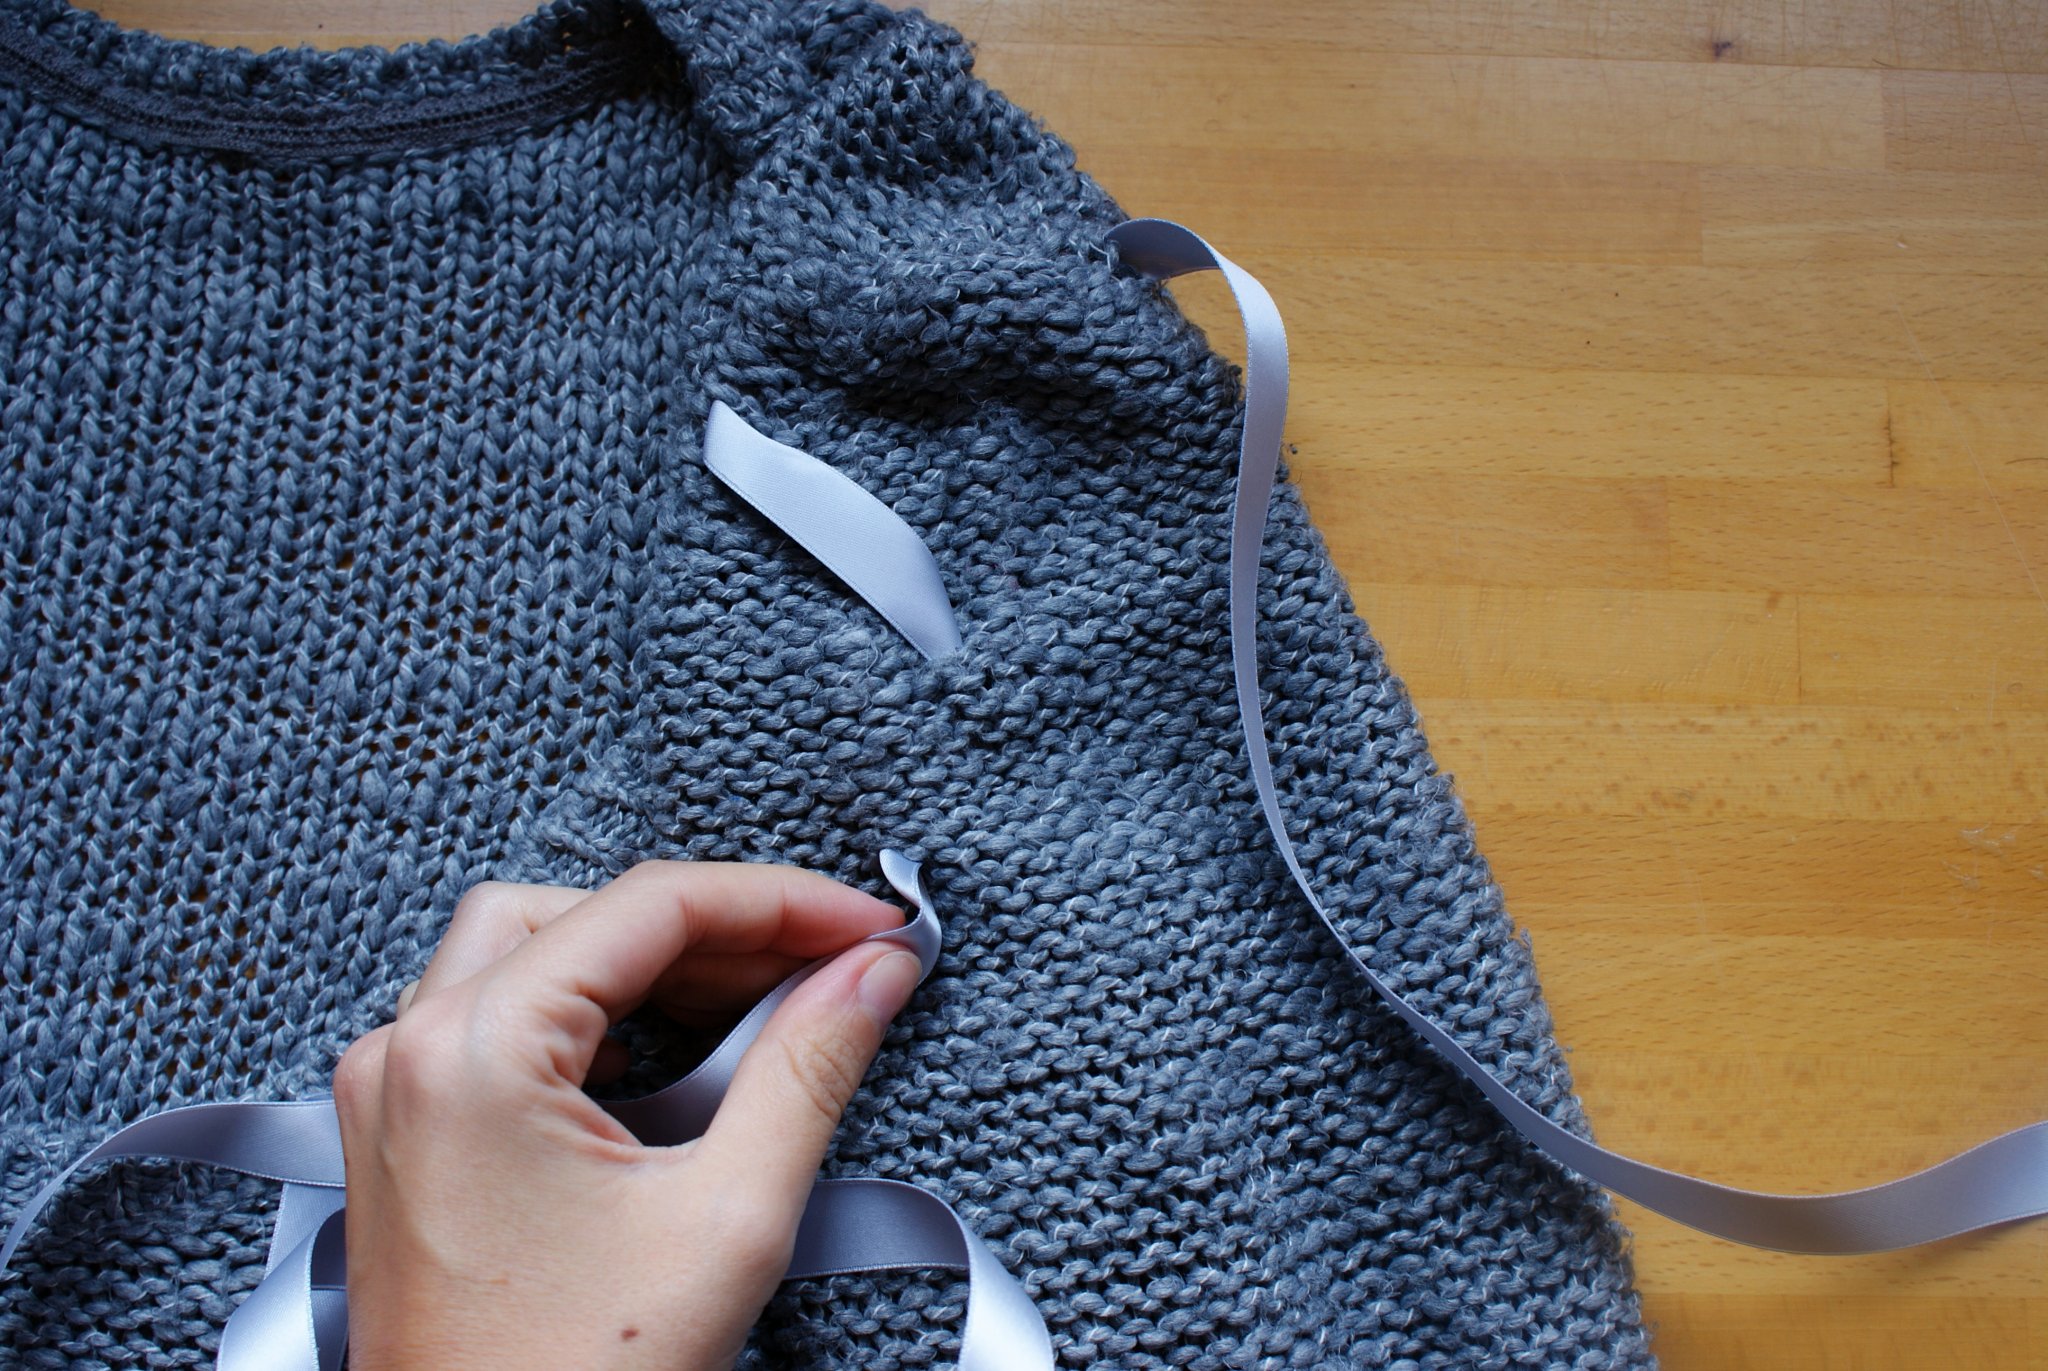
1)
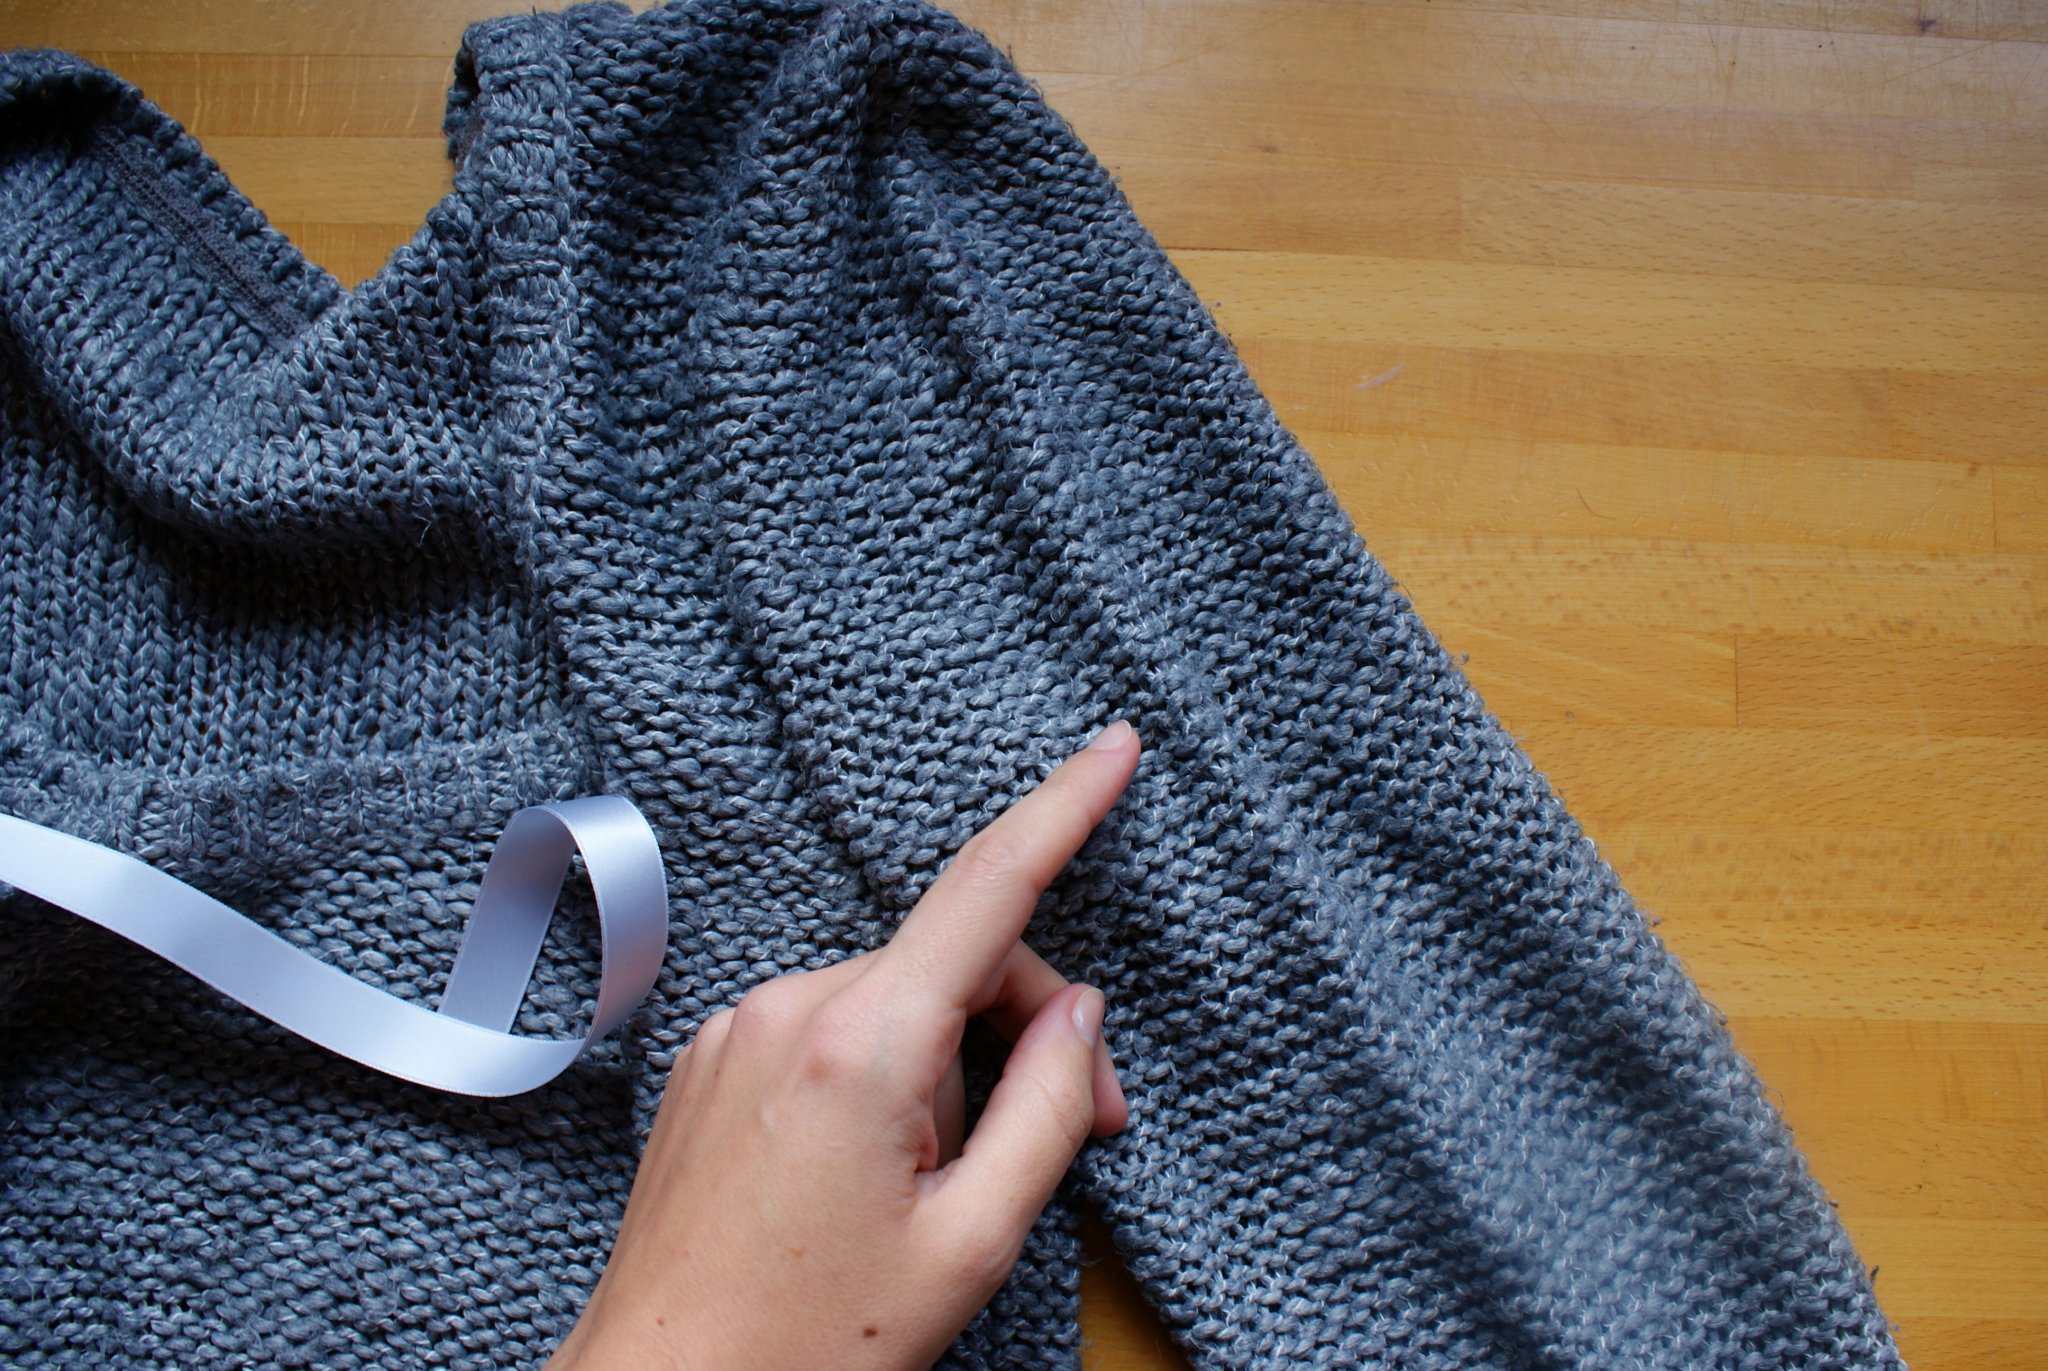
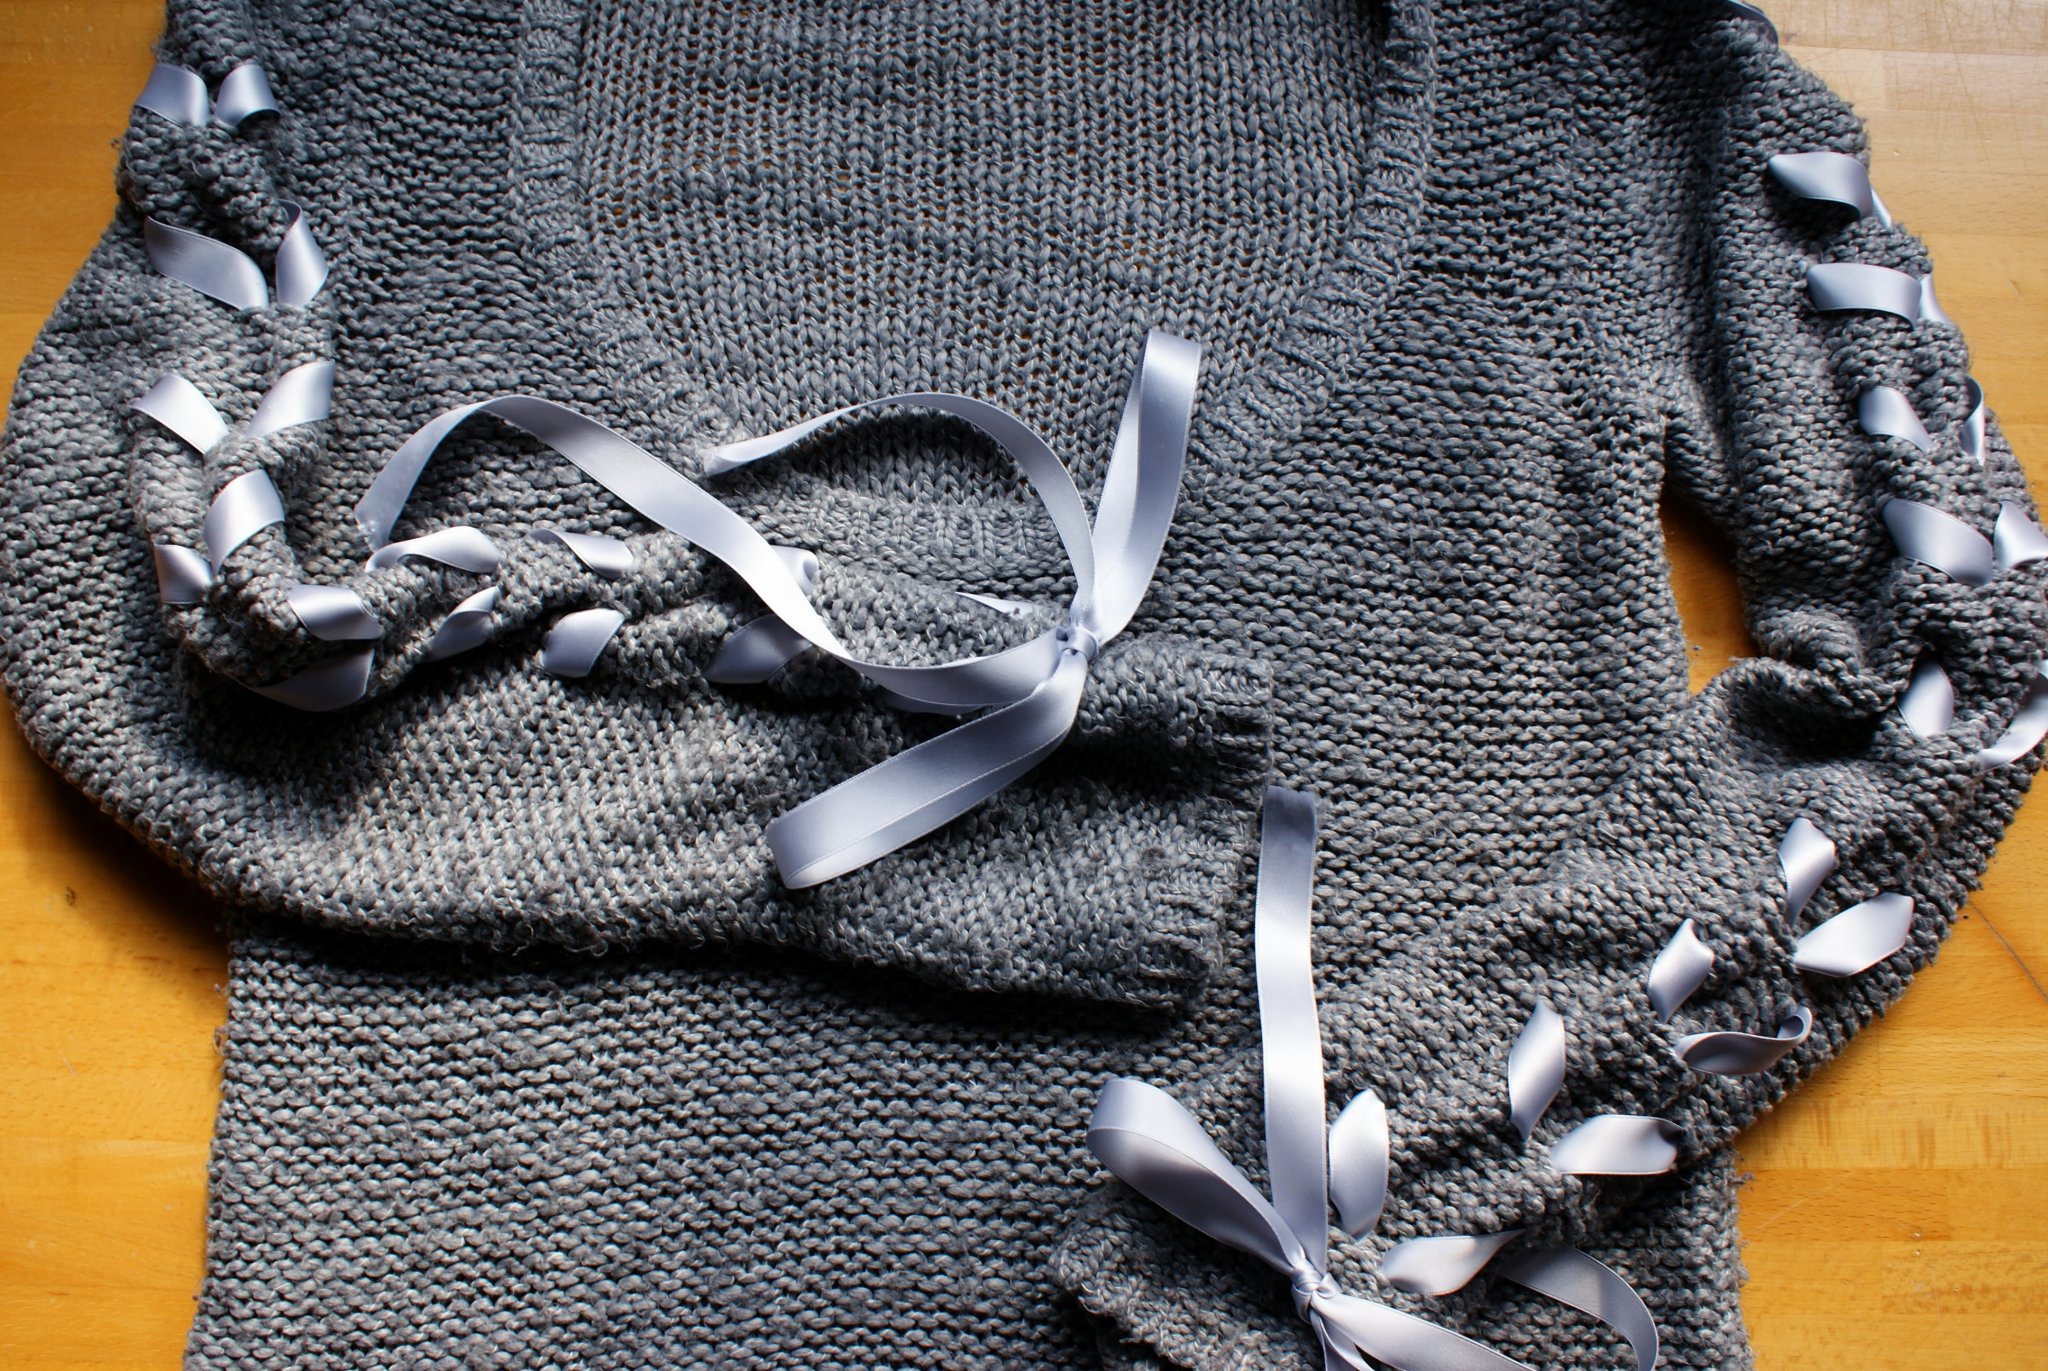
Cut the ribbon in two pieces of 2 mt (78,5 in.) each. Take one and start with the first sleeve. It is important that the sweater is wide woven so that you can make the ribbon pass through it like you are sewing with a (imaginary) big needle. Insert the ribbon from the neck and make the ribbon extremities pass through the sweater at the shoulder height (with same lenght), leaving a few cm from the lateral half of the sleeve. It is harder to describe it than do it, just to help you, the half will be along the side of your arm. // Tagliate il nastro in due pezzi da 2 metri l’uno. Prendetene uno ed iniziate con la prima manica. La trama del golf deve essere larga così che possiate far passare il nastro attraverso, come se steste cucendo con un grosso ago invisibile. Infilate quindi il nastro dall’interno facendo uscire le due estremità all’altezza della spalla (e con uguale lunghezza), lasciando pochi cm dalla metà della manica. Più difficile a dirsi che a farsi, giuro. La metà è semplicemente la linea che segue il lato esterno del vostro braccio.

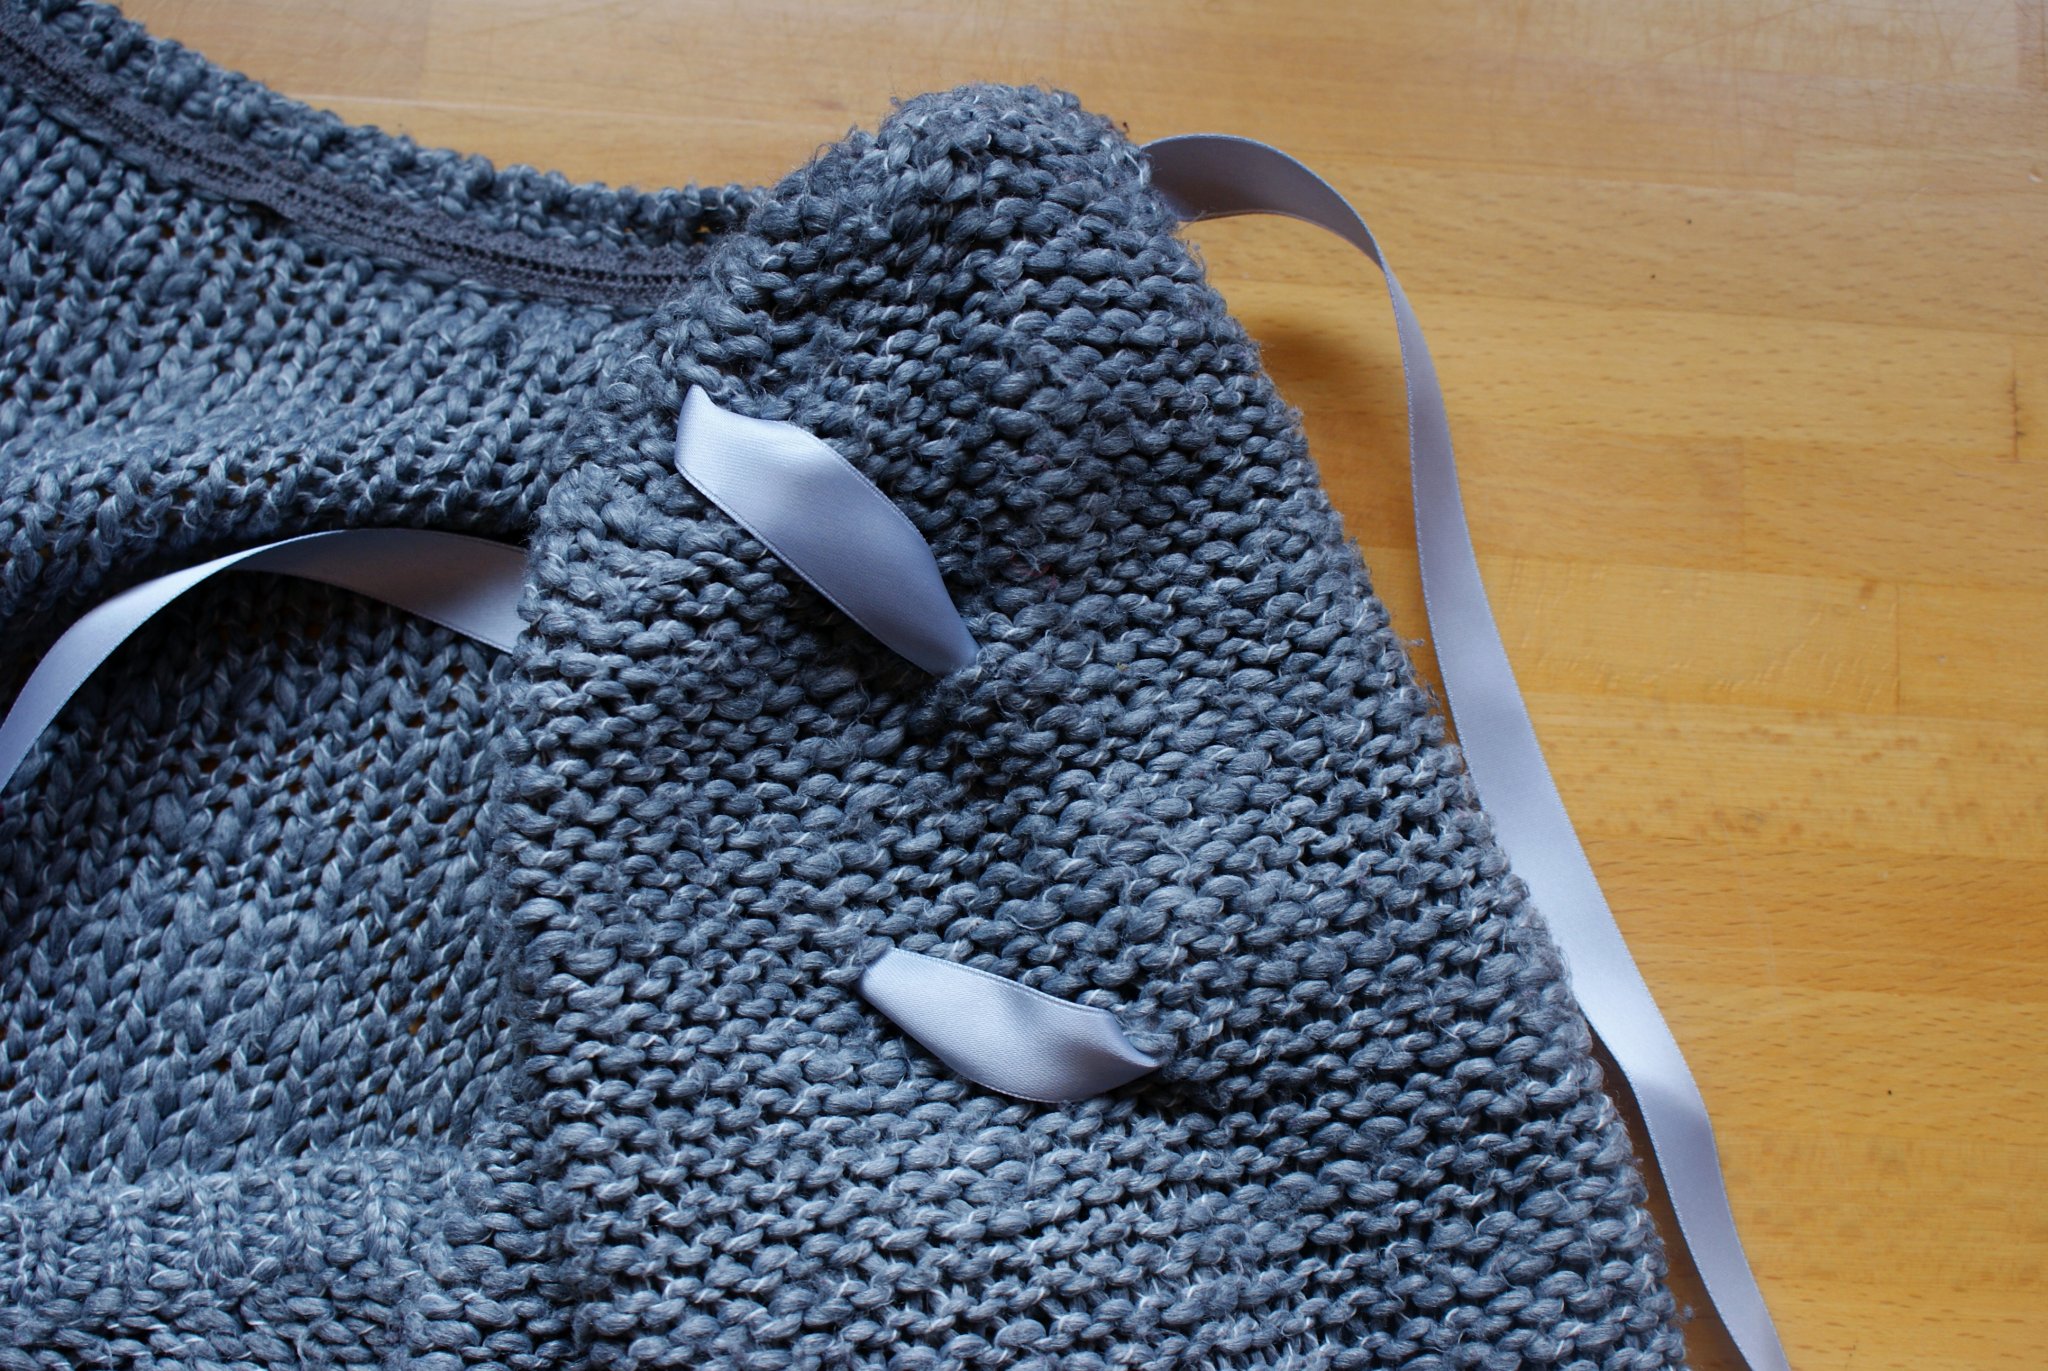
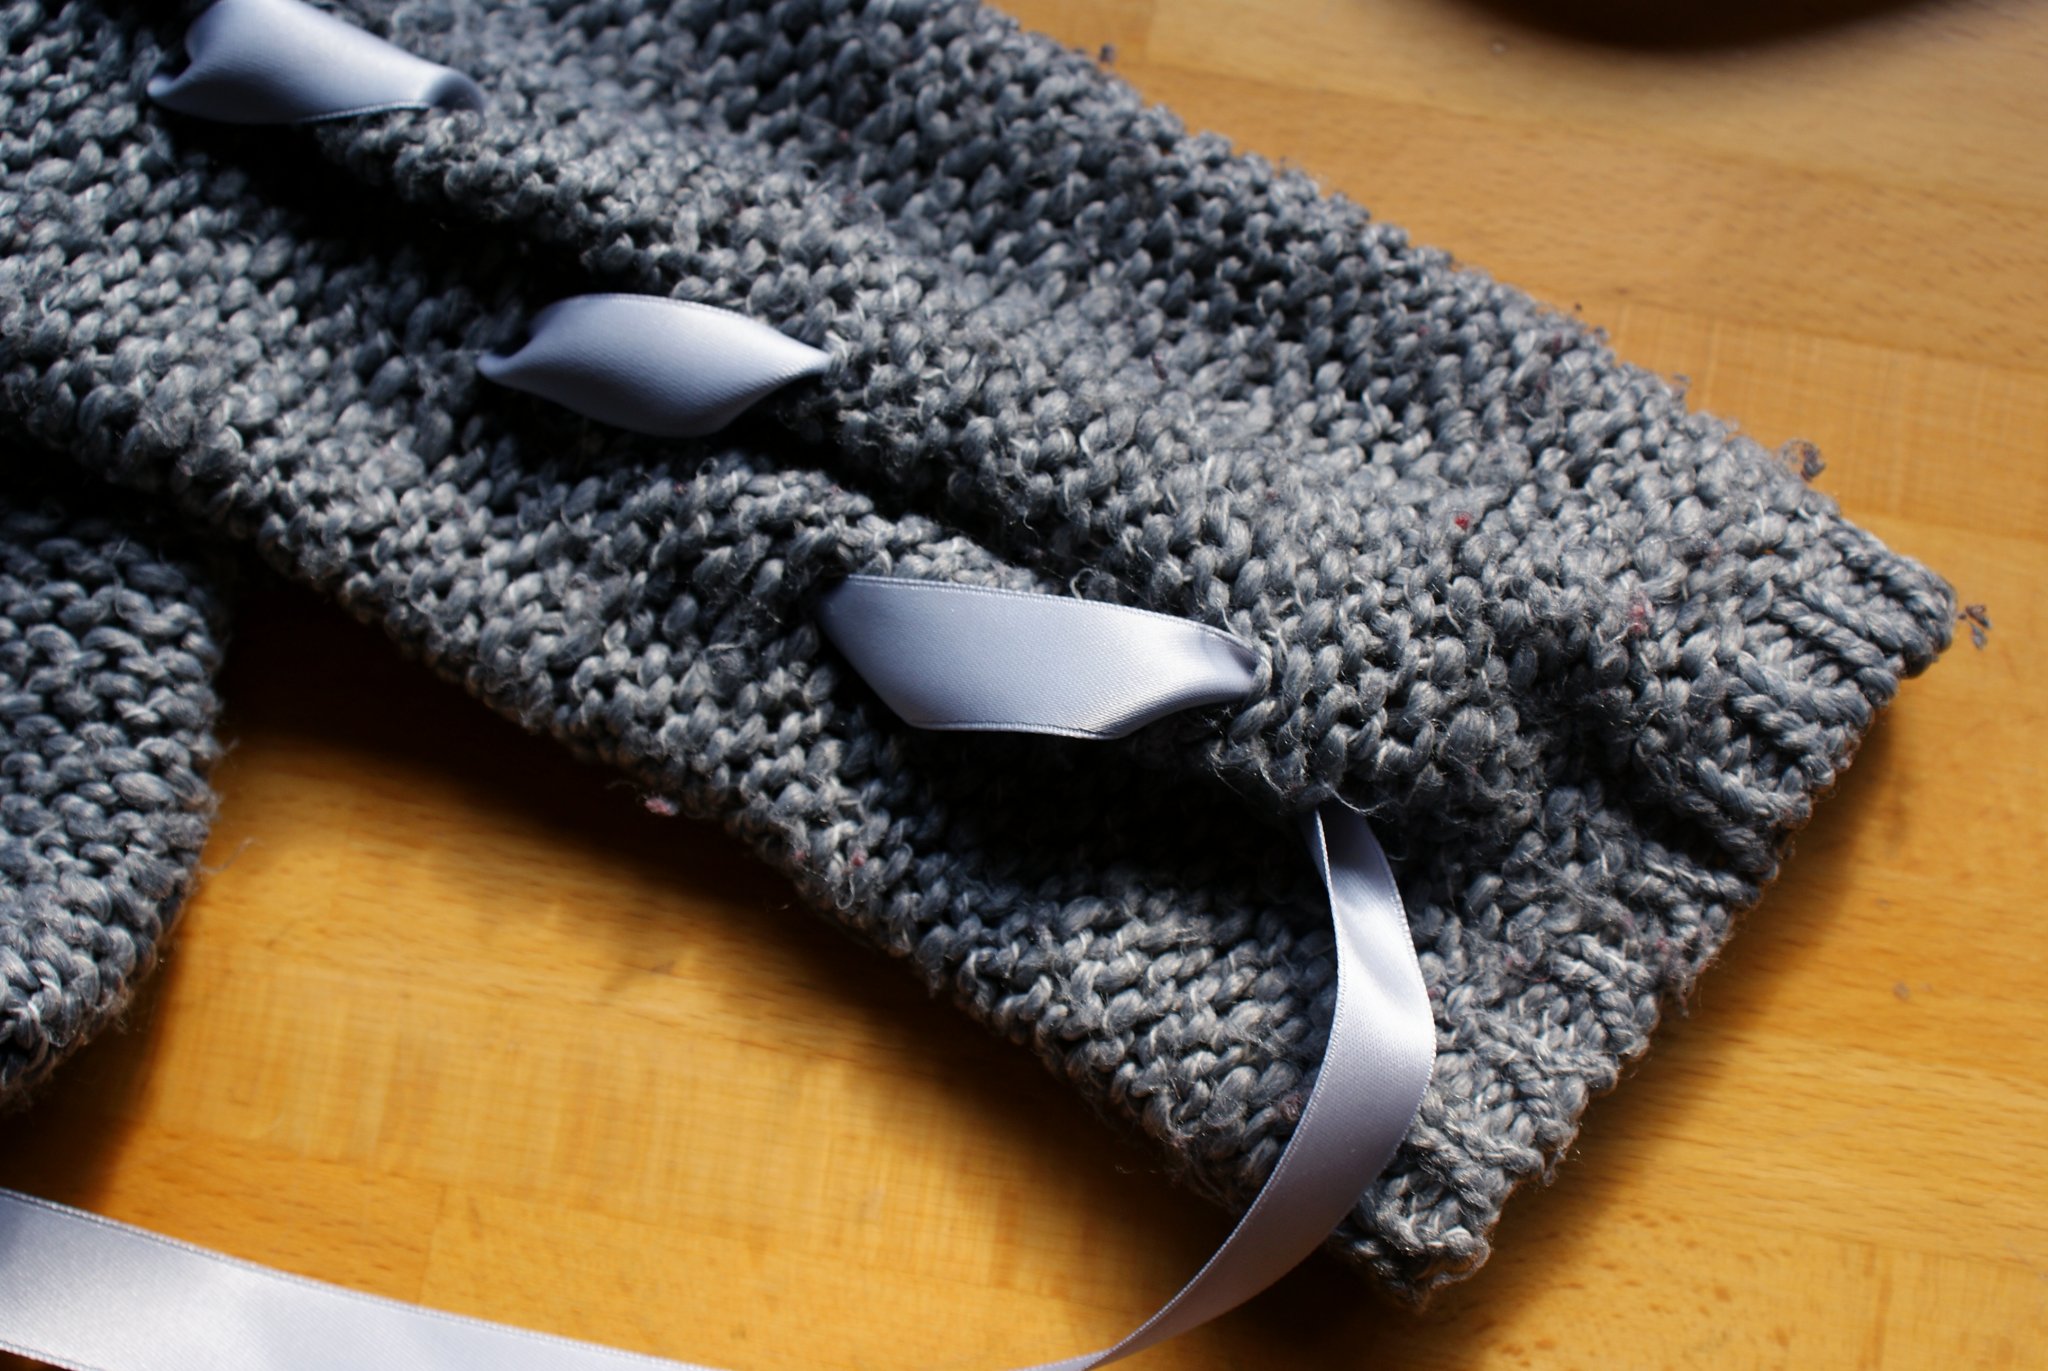
2)
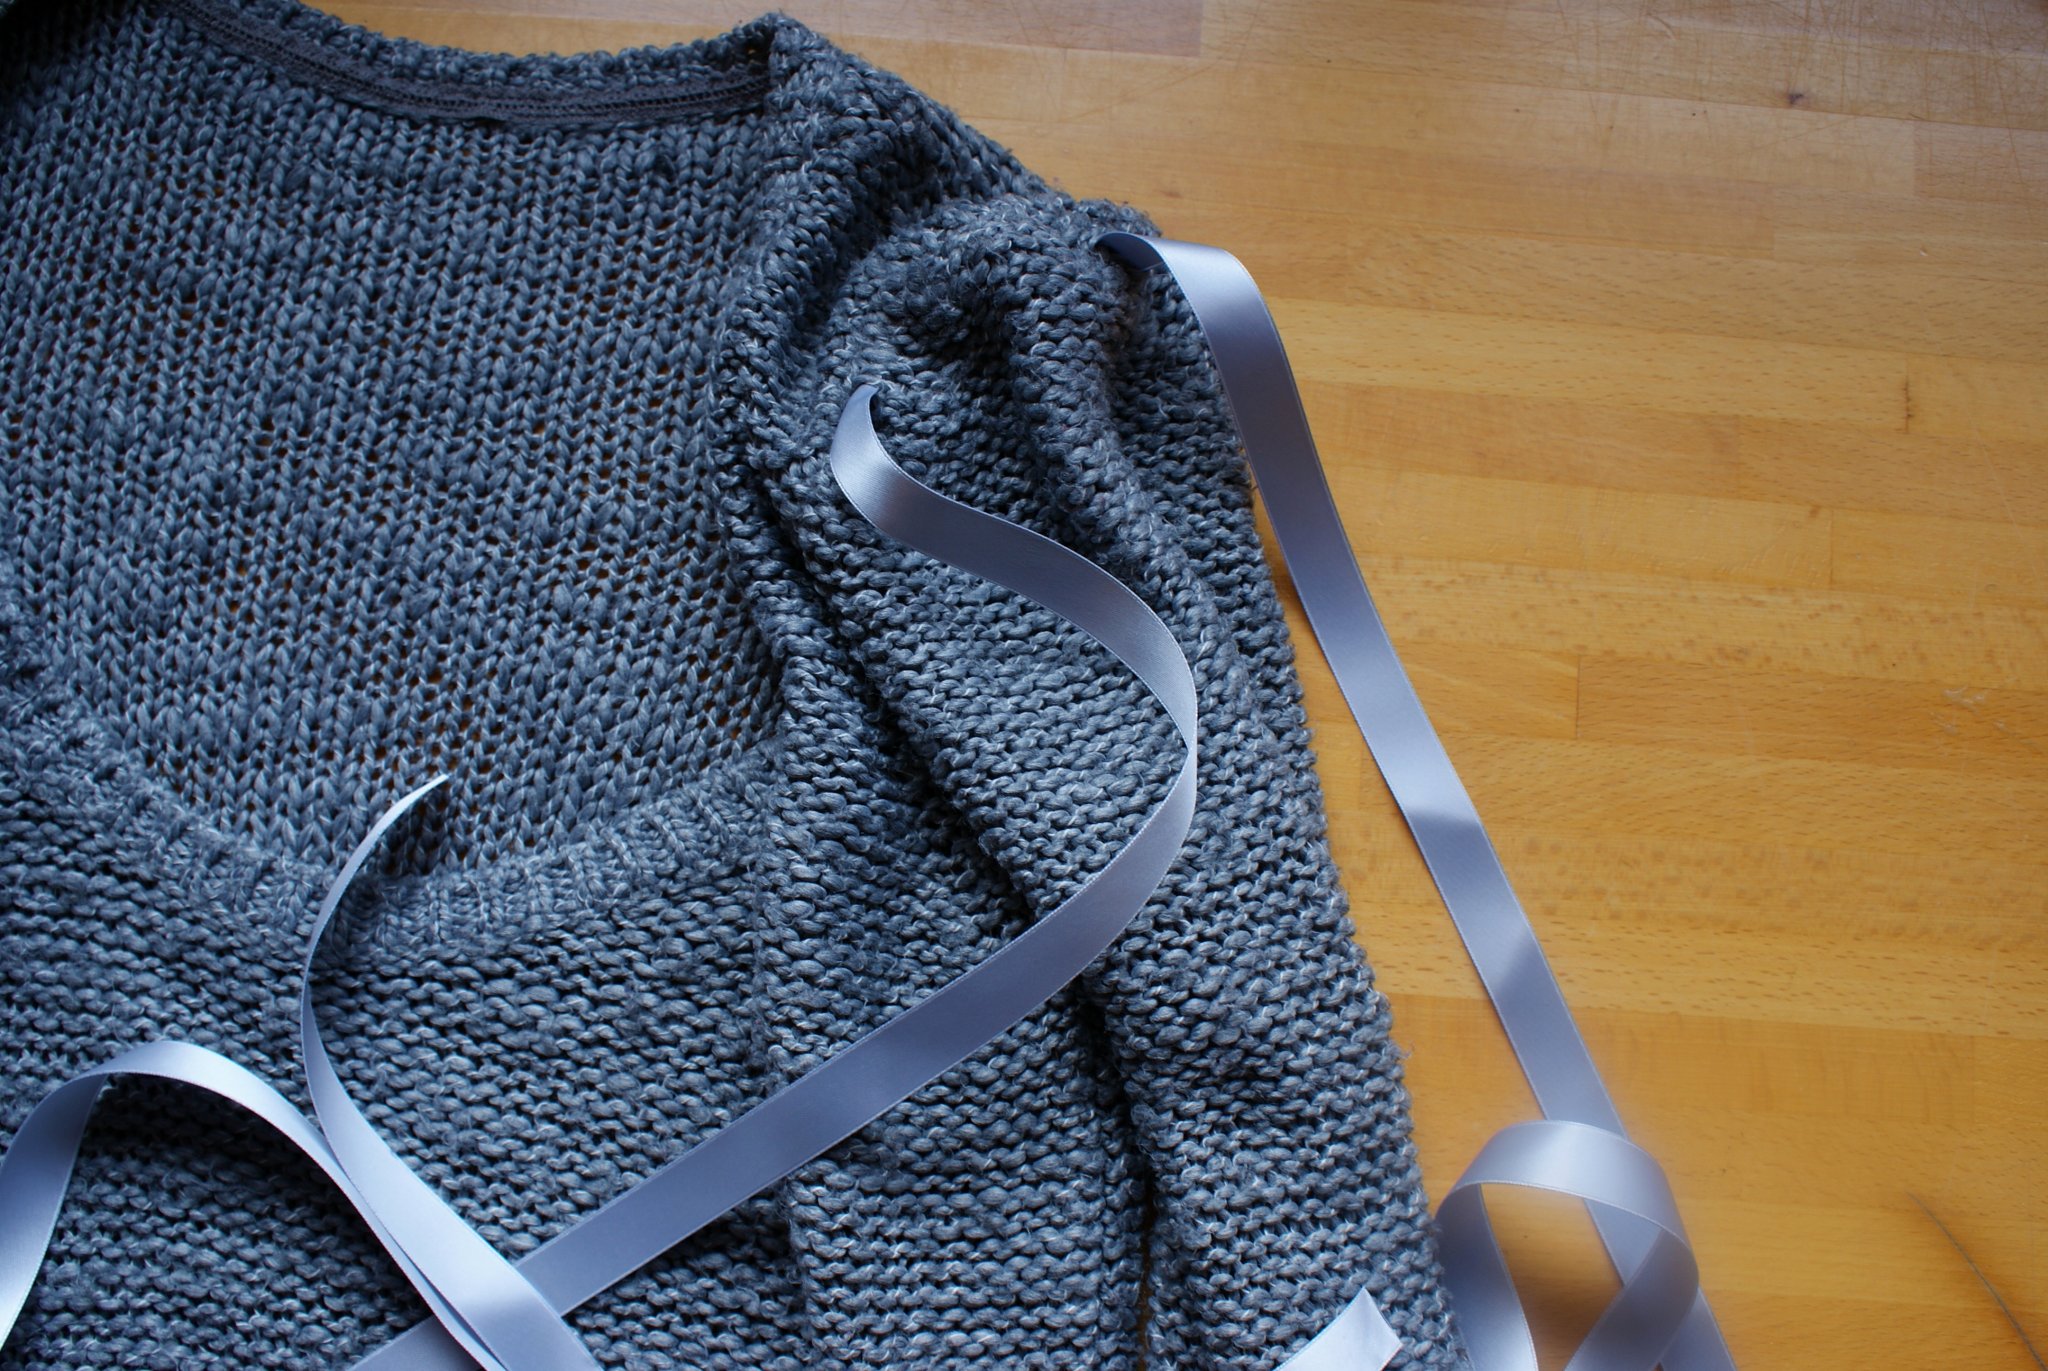
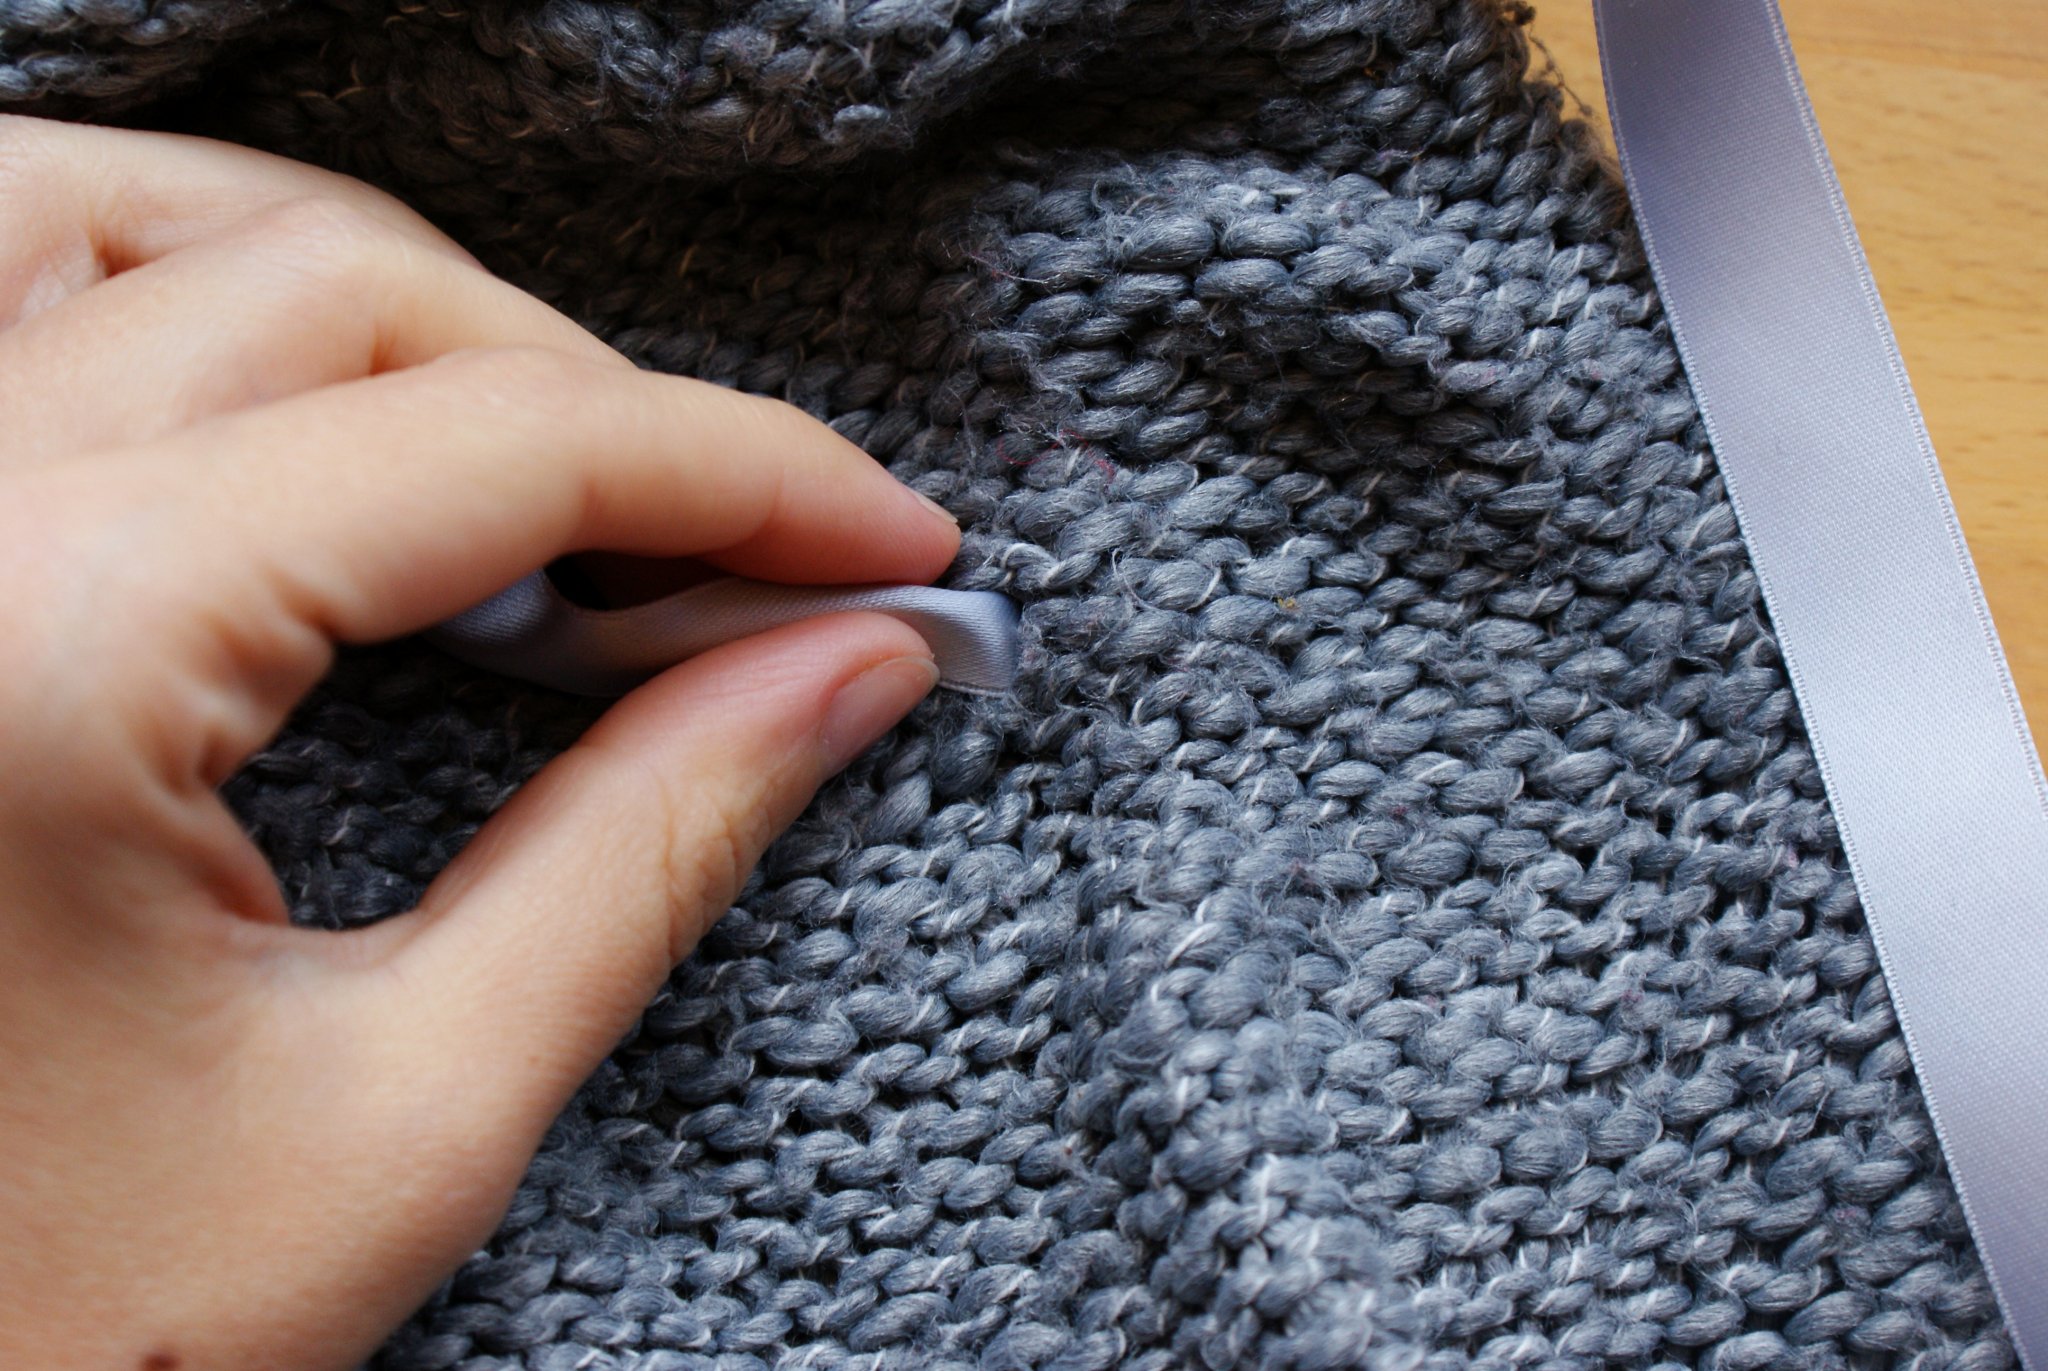
Now start “sewing” the ribbon throught the sweater. Put the left extremity and make it pass in (on the half line) and out (few cm under the previous out point) and so on. Make the same with the right extremity so that you create V stitches that follow the half line. I opted for this detail, but you can also make crossed stitches if you prefer, or anything else you like! // Ora iniziate a “cucire” il nastro attraverso il maglione. Prendete l’estremità sinistra e fatela passare dentro (lungo la linea della metà) e fuori (qualche cm sotto al precedente punto di uscita) e così via. Fate lo stesso poi con l’estremità destra così da creare dei punti a V che seguono la linea mezzana. Io ho optato per questo dettaglio, ma voi potete anche fare dei punti a croce o qualsiasi altro tipo vi piaccia!

3)
Once the sleeve is done, fix the edge of the ribbon sewing the hems or simply by using a lighter (be careful!) and make a bow. // Una volta che la manica è finita, rifinite il nastro o cucendo gli orli o usando un semplice accendino (ma attente eh!), poi fate un bel fiocco.
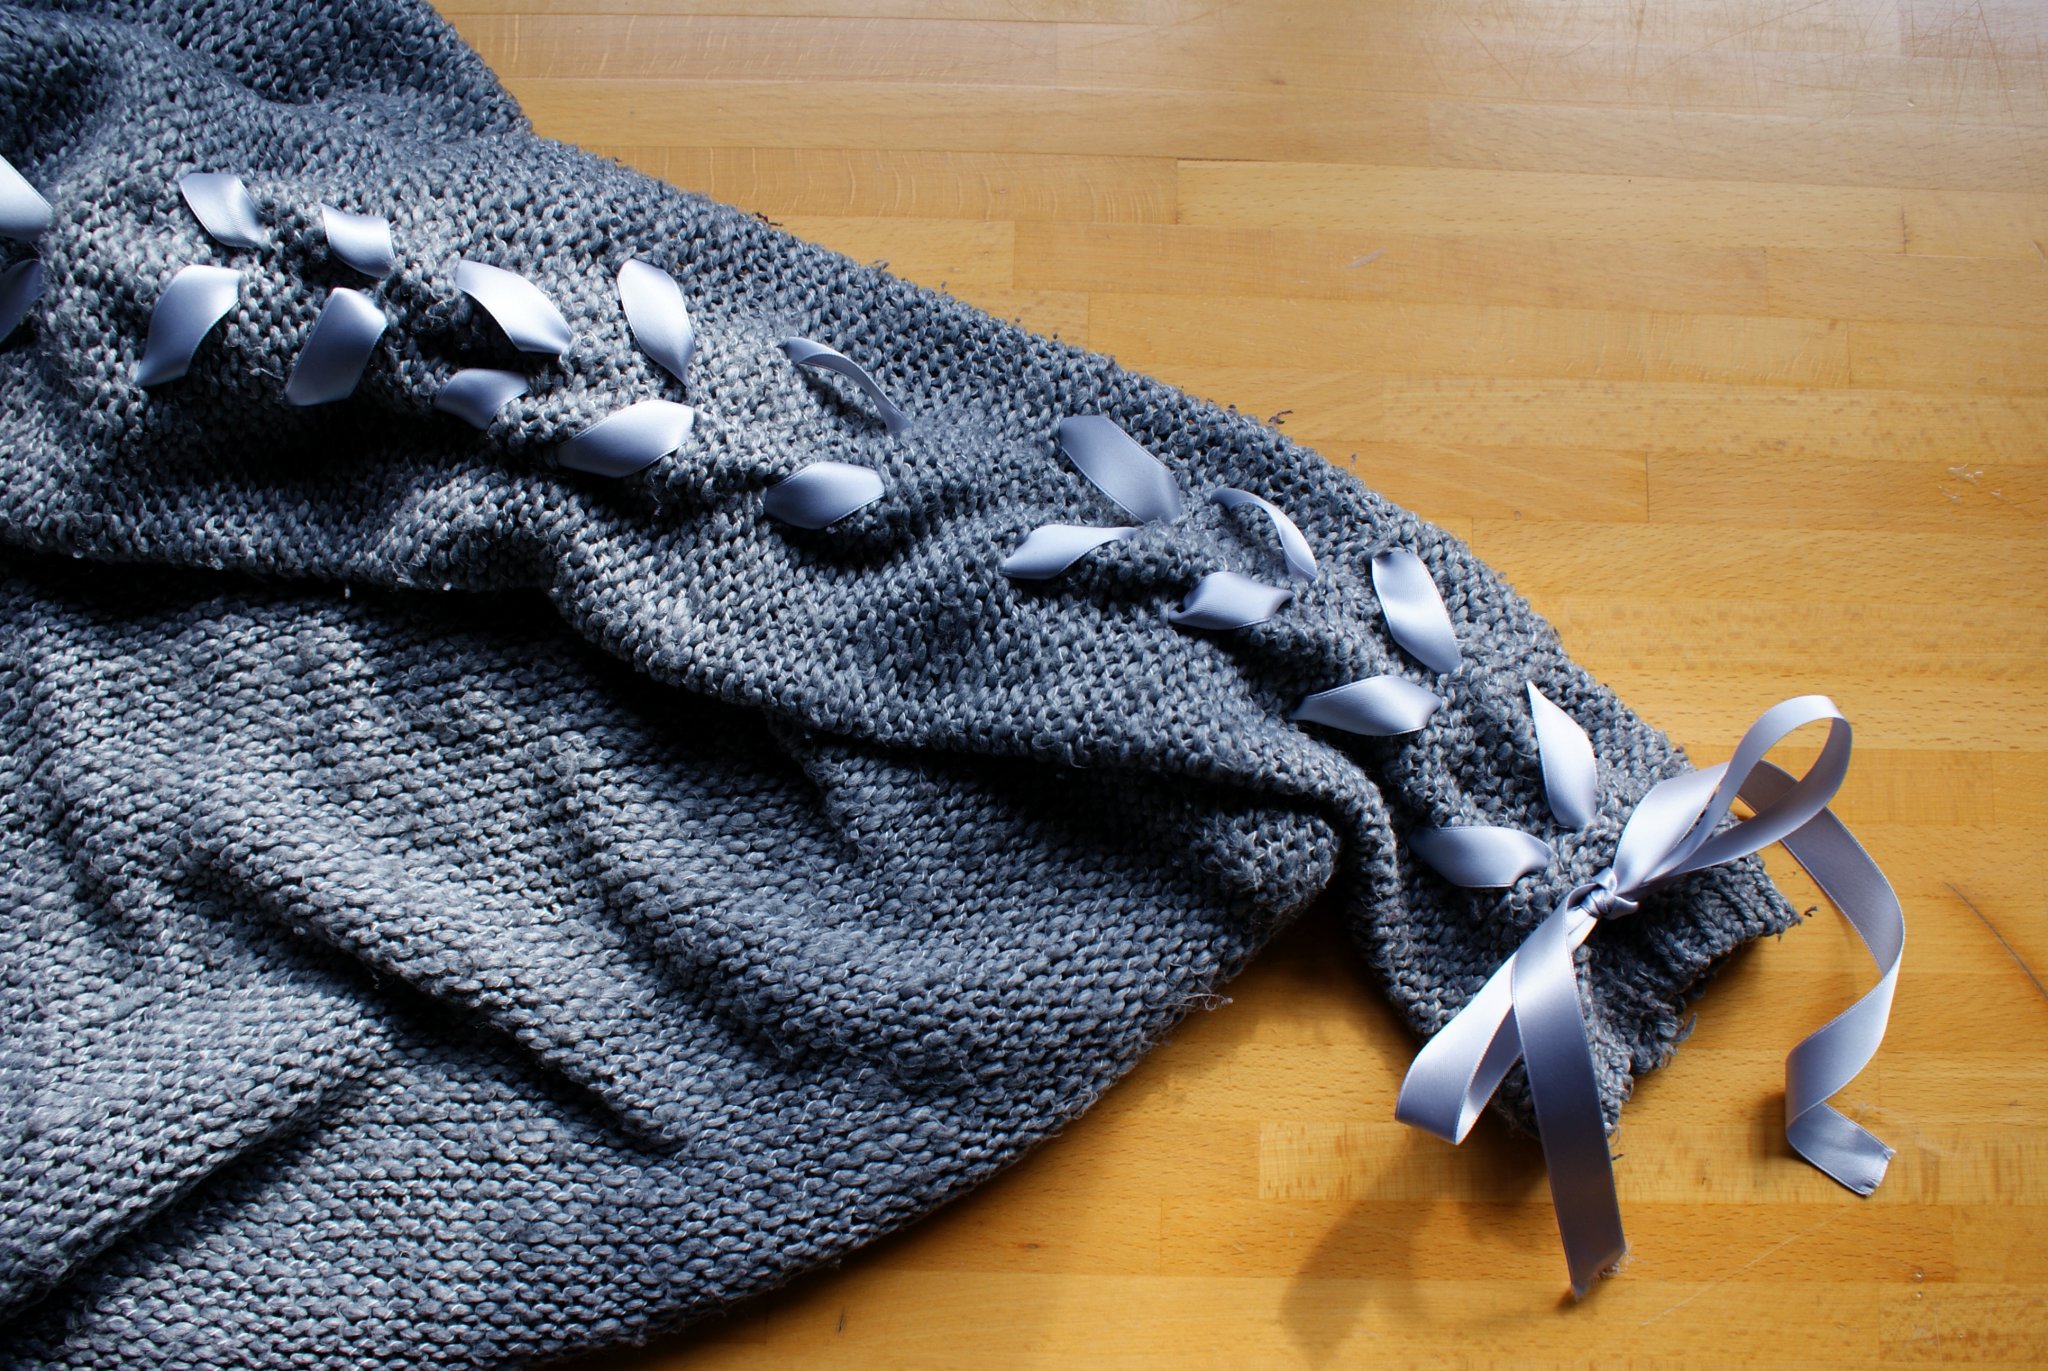
4)
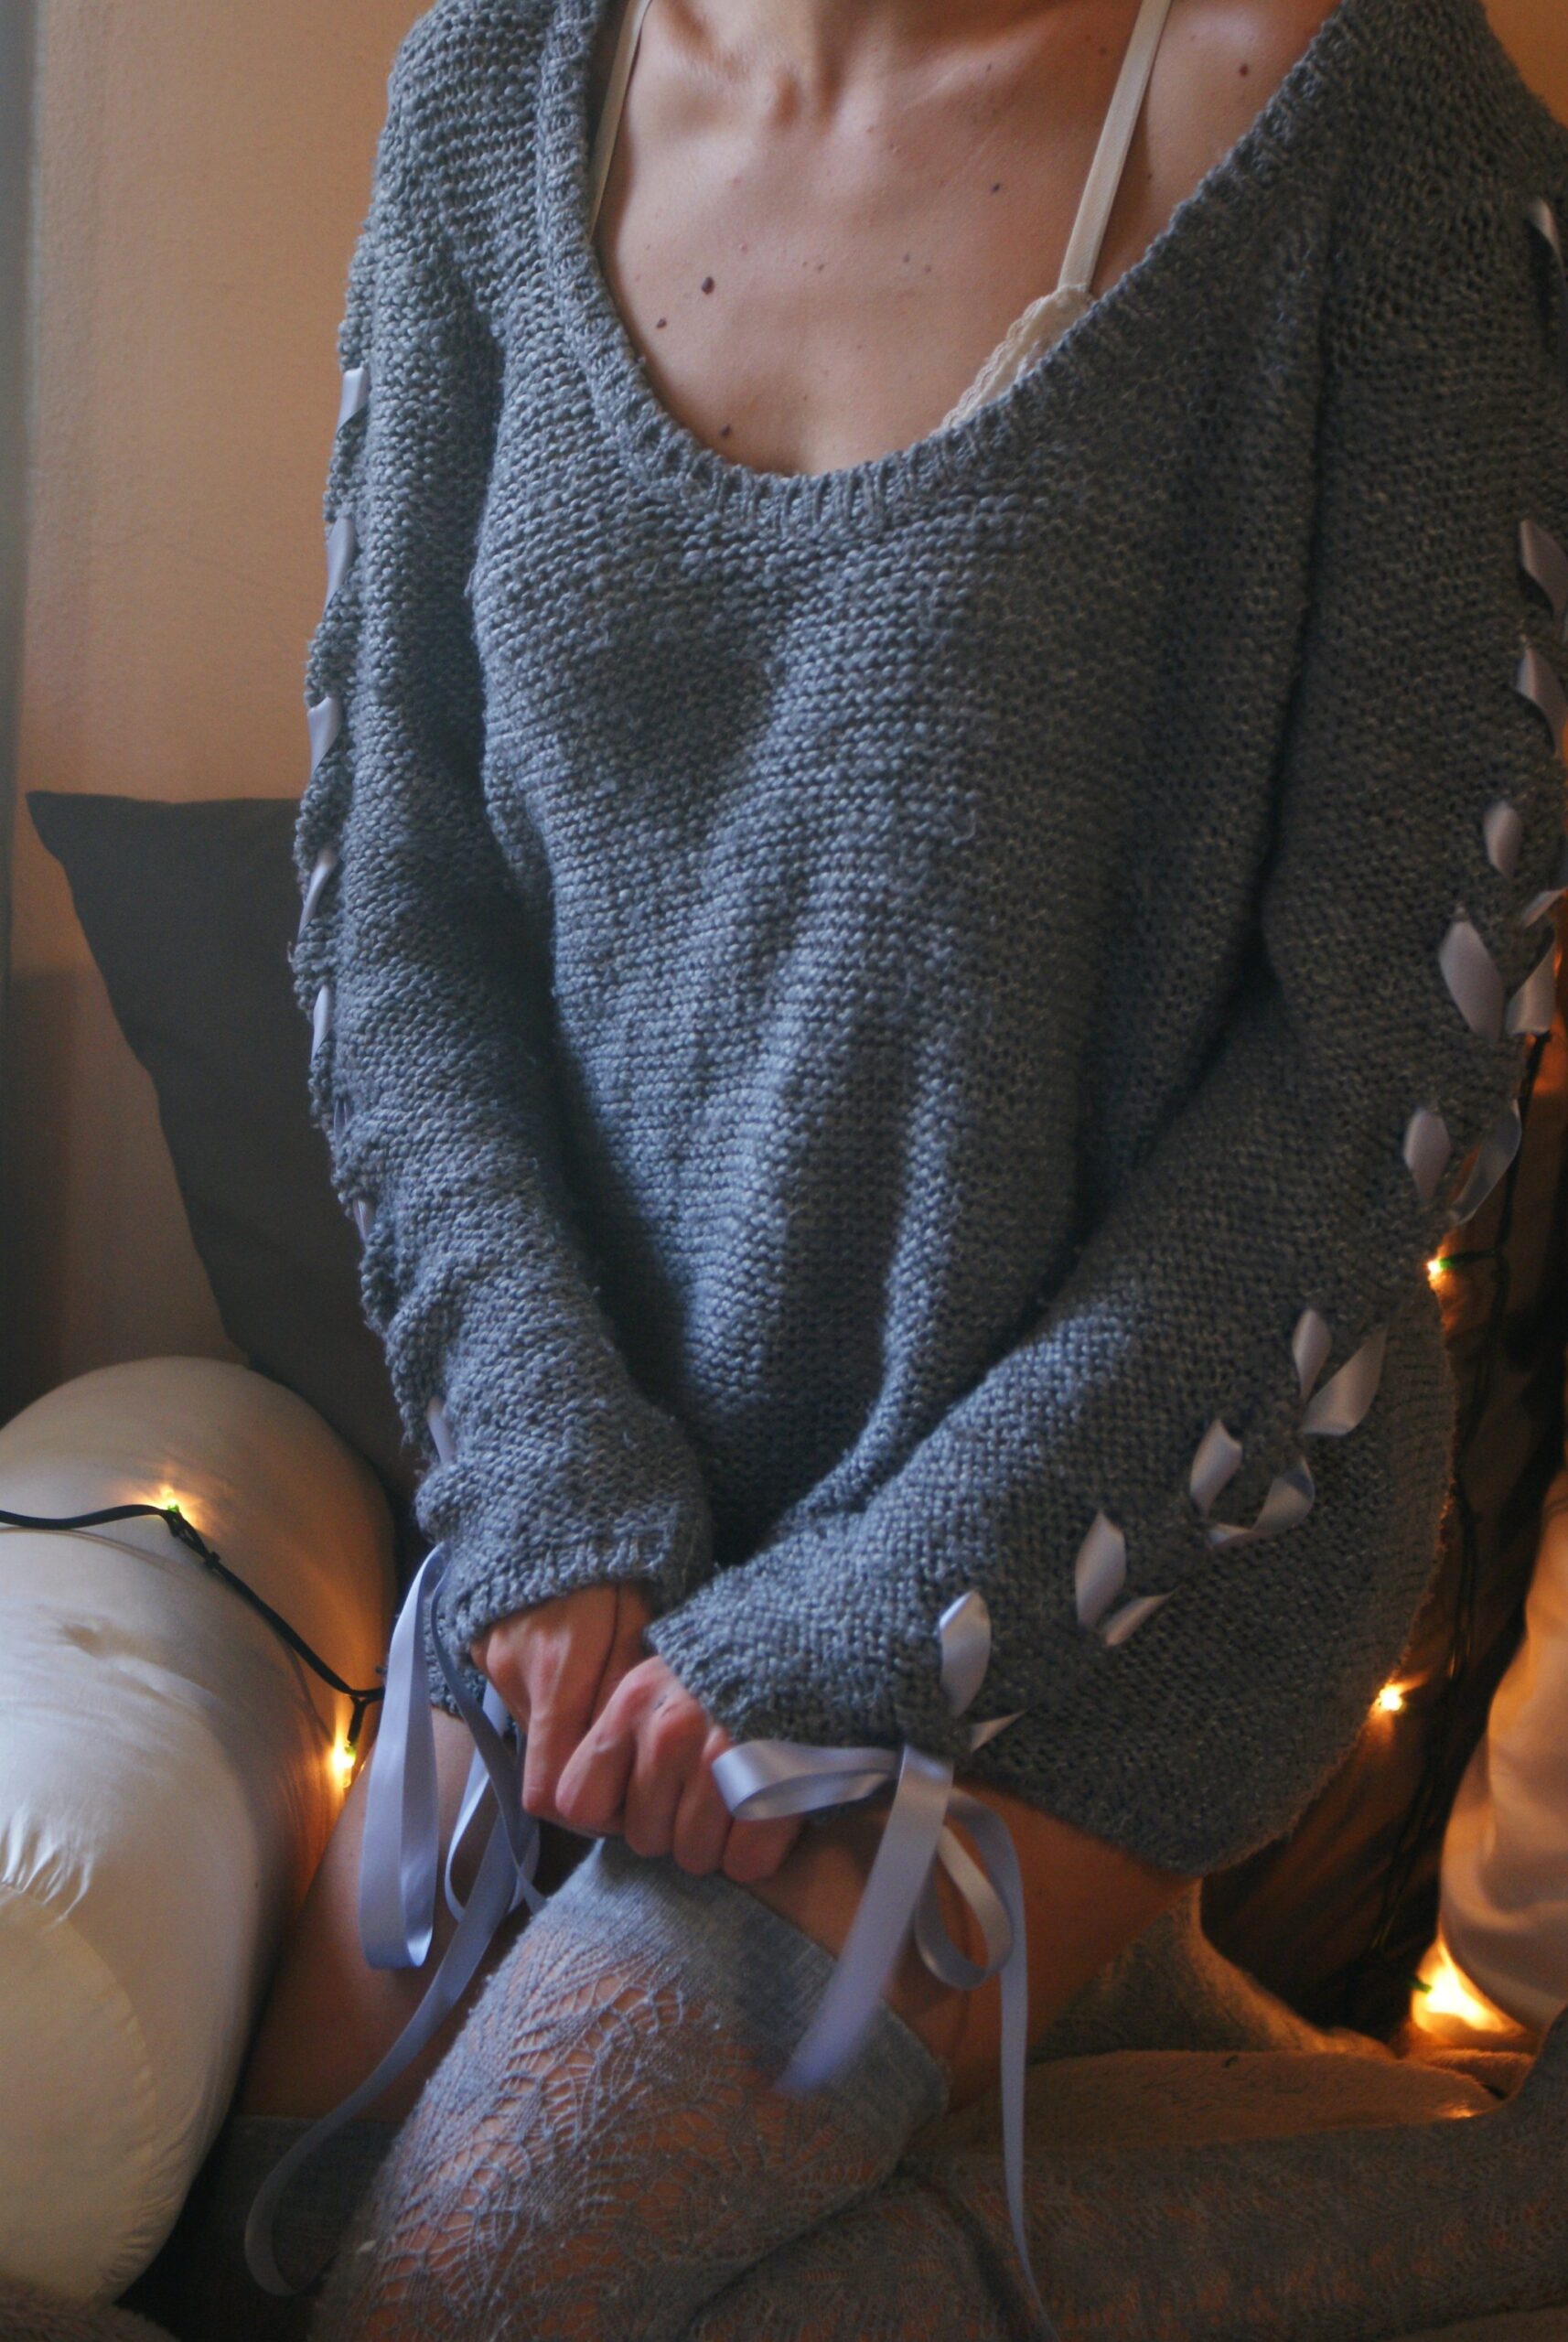
Repeat with the other sleeve and you’re done! It took me about one hour to finish it, something that makes it not the quickest DIY ever, but it’s so easy to make that you can do it while watching a movie! No pro skills needed, only a bit of patience but the result is totally worth it! // Ripetete con l’altra manica e avete fatto! Io ci ho messo circa un’ora, cosa che non lo rende propriamente il fai da te più veloce di sempre, ma è così facile da realizzare che potete provarci persino mentre guardate un film! Insomma, non occorrono grandi capacità, solo un po’ di pazienza, ma ne varrà la pena!
Voilà! If you want to add a few new sweaters to your wardrobe and also try out this DIY, have a look on Micolet to find cheap second-hand clothing. They have a huge selection of clothing and different brands so you are sure to find your favourite and then you can make it your own by using my little DIY! Have a look now so you’re ready to look great this Fall! // Voilà! Se volete aggiungere qualche golfino al vostro guardaroba e provare questo DIY, date un’occhiata a Micolet: troverete tantissimi vestiti di seconda mano a prezzi davvero cheap! Sceglietene uno e personalizzatelo seguendo il mio tutorial e sarete perfette per l’Autunno!


Did you like the post? Pin it on Pinterest!
This post is in collaboration with Micolet. Opinions are my own.
Questo post è in collaborazione con Micolet, ma non sono stata pagata o ricompensata in alcun modo per parlare bene dei prodotti. L’articolo rispecchia in modo trasparente la mia opinione.


