")
Every start of the year is the same story: should I buy a calendar or not?
Obviously not, I can remember EVERYTHING. And, punctually, after two months, the only thing I can remember is me, the year before, saying: okay, next time, calendar yes.
//
Ogni inizio anno la solita storia: dovrei comprare un calendario o no?
Ovviamente no, io posso ricordare TUTTO. E così, puntualmente, due mesi dopo, l’unica cosa che ricordo è me stessa, un anno prima, dire: okay, la prossima volta, calendario sì.
I have this thing… about buying something that after 12 months I have to throw away… that… I don’t like it. However, I understand that I am not able to keep everything in mind, so, when my boyfriend asks me <<Remember to remember me (yes, always) to do this thing>> I realize that it is time to have a calendar, especially now, living together (with double things to do). So, I know that it is March, but as I told you, I am a bit diehard. The nice thing is that you can do this calendar in few minutes and your house will have that irresistible rustic touch.
//
Il fatto è che c’è un qualcosa… nel comprare una cosa che dovrò buttare 12 mesi dopo… che proprio non mi piace. Tuttavia, capisco anche che non sono in grado di tenere tutto a mente, così, quando il mio ragazzo mi dice: <<Ricordati di ricordarmi (sì, sempre) di fare quella cosa>> realizzo che è arrivato il momento di avere un calendario, specialmente ora, che vivendo insieme, le cose da ricordare sono il doppio. Dunque, so che è Marzo, ma come vi ho detto, sono un po’ testarda. La cosa bella è che potrete realizzare questo calendario in pochi minuti e la vostra casa avrà subito un irresistibile tocco rustico.
***
You need // Vi occorre:
- Plywood. // Compensato.
- Pen, red marker, brush, tempera. // Penna, pennarello rosso, pennello, tempera.
- A peg. This one is so special for me, because it was my grandpa’s. // Una molletta. Questa è molto speciale per me, perchè appartenuta a mio nonno.
- Leaves. // Fogli.
- Rope. // Spago.


How to // Come procedere:
1)
Use your phone to have months-scheme to follow, leaving some space for names. You could ask: why doing a calendar when you have it on your phone? Answer: I like written things. // Usate il vostro telefono per avere lo schema dei mesi, lasciando un po’ di spazio per i nomi. Voi potreste chiedere: perché fare un calendario quando ne hai già uno sul telefono? Risposta: mi piacciono le cose scritte.


2)
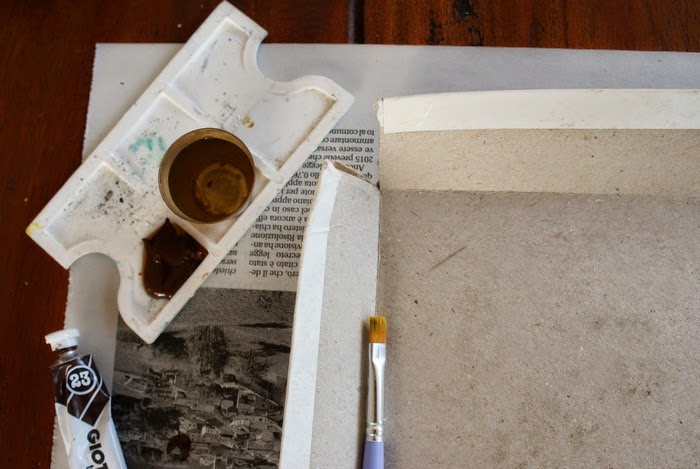
Take some water and dip the brush in it, then in the color you chose. Make some tests on a newspaper before painting your leaves. // Prendete un po’ d’acqua ed intingetevi il pennello, poi prelevate il colore scelto. Fate qualche prova su un giornale prima di dipingere i fogli.

3)
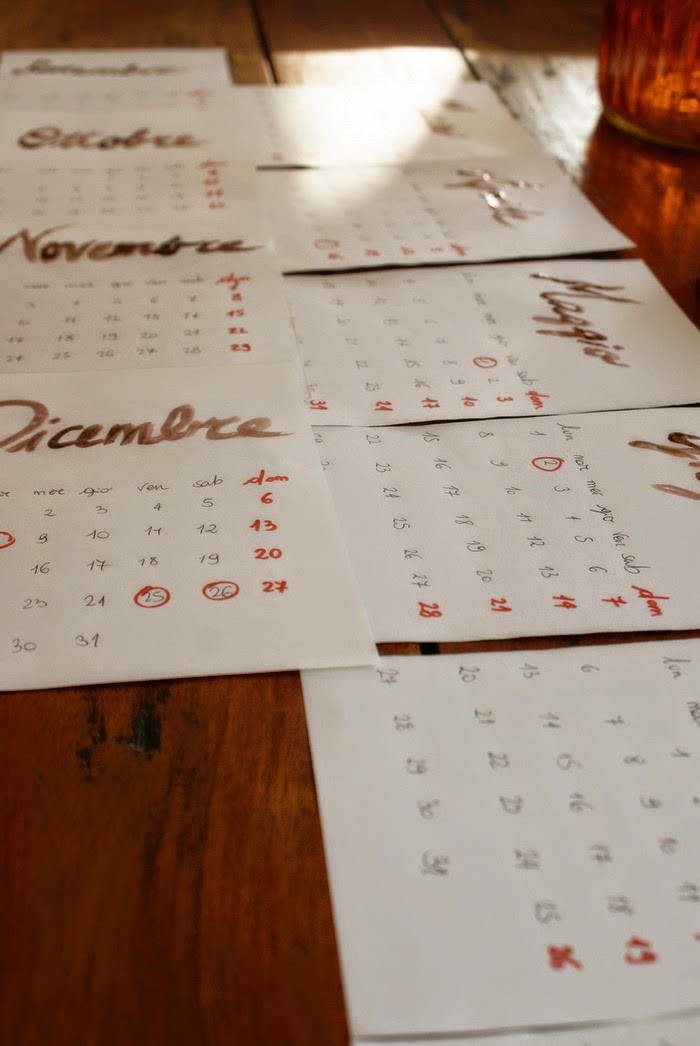
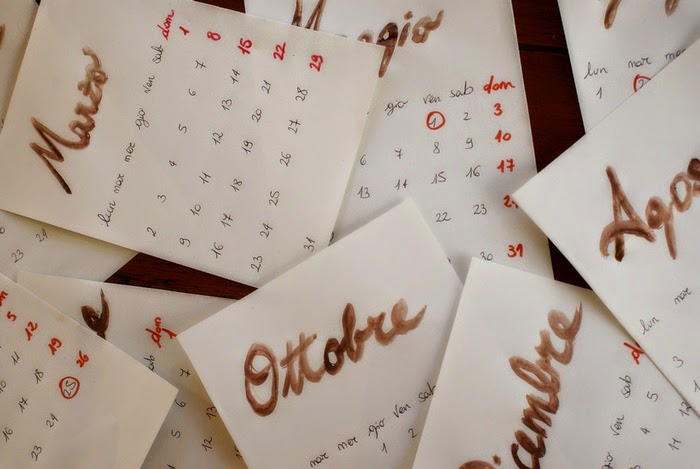
Start painting names! // Cominciate a dipingere i nomi!


4)
Wait about 10 minutes to let color dry… Awww… December!// Aspettate circa 10 minuti per lasciare asciugare il colore… Ohhh, Dicembre!

5)
Make two holes in your plywood (I used a screwdriver), then take some rope, make it pass through the holes and knot it. // Fate due buchi (io ho usato un semplice cacciavite), poi prendete dello spago, fatelo passare nei buchi e fate due nodi.


6)
Order your calendar pages, then pinch them to the plywood with the peg. // Ordinate le pagine del calendario, poi attaccatele al compensato con la molletta.

")
7)
Voilà! // Voilà!
")
")
I will reuse it the next years, I will do new leaves and it will be as new! Happy rustic day! // I prossimi anni lo utilizzerò nuovamente, mi basterà fare nuovi fogli e sarà come nuovo! Buona giornata rustica!


