")
It is cold and gray today but my Spring-Summer soul doesn’t care about weather too much, so I am totally in that warm mood, all made by pretty light clothes and walkings in the sun.
Oh, what a dream!
//
Oggi fa piuttosto freddo ed è tutto grigio qui, ma il mio animo Primaverile-Estivo non si dà per vinto, infatti sono completamente immersa in pensieri riguardanti abiti leggeri e camminate al sole.
Oh, che sogno!
Anyway, today I show you how to make a sides cut-out crop top starting from a single piece of fabric (I opted for linen because I like so much!), then I’ll run to my little cousin’s birthday party to celebrate her with the whole family (and mountains of food, yay!). So, don’t waste time talking and let’s see how to do this top!
//
In ogni caso, oggi voglio mostrarvi come realizzare un crop top aperto sui fianchi partendo da un singolo pezzo di tessuto (io ho scelto il lino perché mi piace troppo!), poi correrò alla festa di compleanno della mia cuginetta, per festeggiarla con tutta la famiglia (e montagne di cibo, yee!). Dunque, non perdiamo tempo in chiacchiere e vediamo come fare questo top!
***
You need // Vi occorre:
- A piece of fabric with width equal to your shoulder-to-shoulder width and lenght of about
1 meter (39 in). // Un pezzo di tessuto che sia largo quanto la distanza tra le vostre spalle e
lungo circa 1 metro. - 1 meter (39 in) x 4cm about (1,5 in) of black elastic band. // 1 metro x 4cm di fascia
elastica nera. - Needle and thread. // Ago e filo.
- Scissors. // Forbici.

How to // Come procedere:
1)
Start folding in half the fabric. // Cominciate piegando a metà il tessuto.

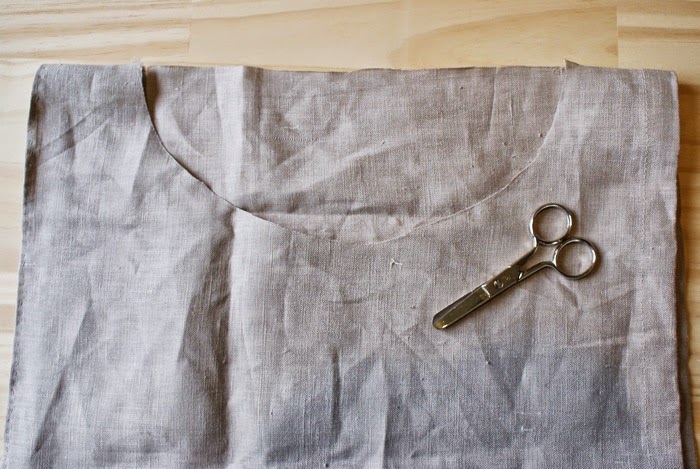
2)
Cut a line following the fold ald leaving about 10 cm (3,9 in) by the sides (the straps). // Tagliate una linea, seguendo la piega, lasciando circa 10 cm dai lati (le spalline).

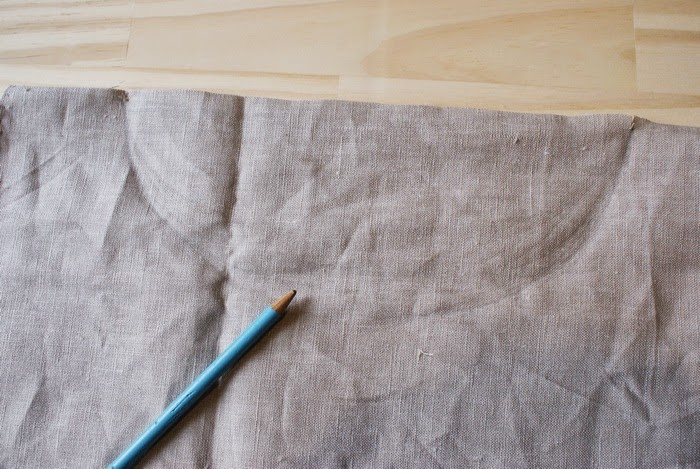
3)
Draw the frontal neckline of the top with a pencil (I opted for a rounded one), then cut following the line you drew. The important is that your head can pass easily through the hole. // Disegnate lo scollo anteriore del top con una matita (io ne ho scelto uno a barca), poi tagliate seguendo la linea disegnata. L’importante è che la vostra testa passi facilmente attraverso il buco.
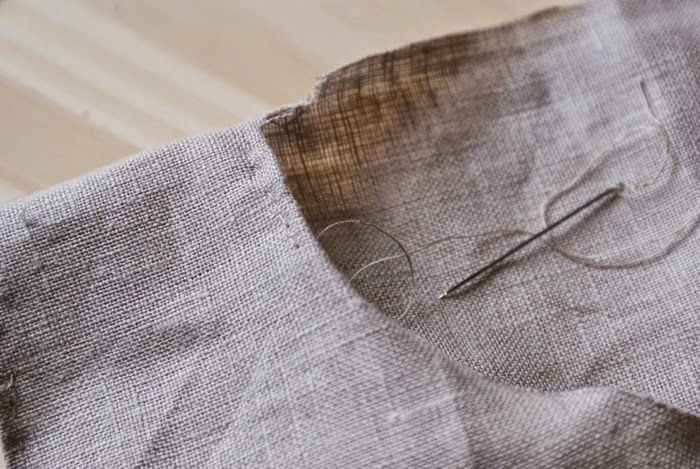
4)
Cut about 1 cm (0,39 in) from the neckline to the two straps (it will help you to create the neckline hem). // Tagliate circa 1 cm dallo scollo verso le due spalline (vi aiuterà a creare l’orlo dello scollo).

5)
Fold the neckline and start sewing it. // Piegate lo scollo e cominciate a cucirlo.

6)
You will obtain something like this. Now, repeat with the back to complete the neckline. // Otterrete qualcosa di simile a questo. Ora ripetete con il retro e completate lo scollo.

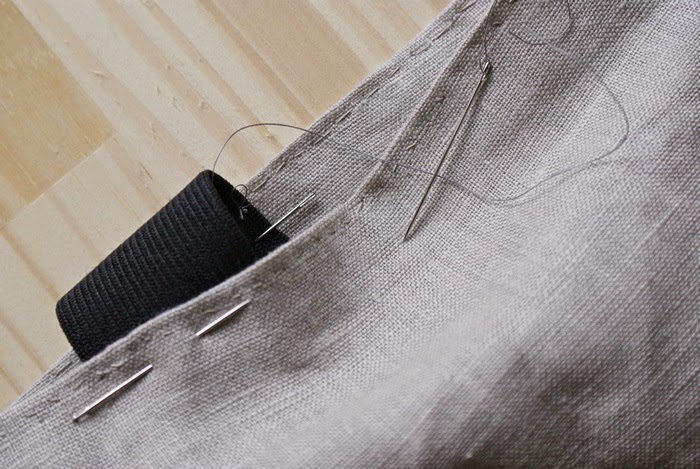
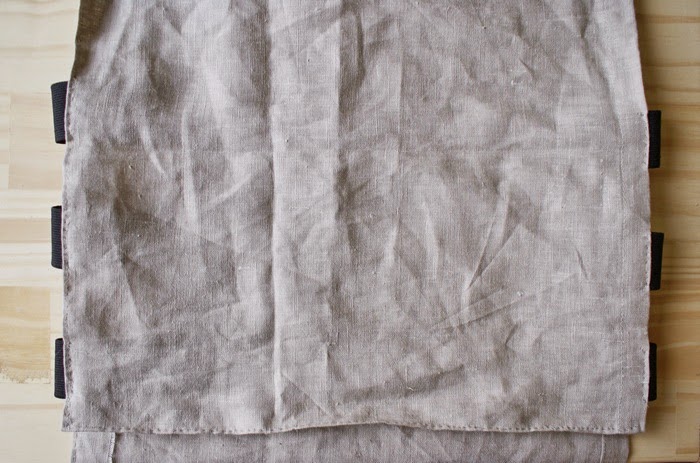
7)
Cut the elastic band in 6 pieces, each of 10 cm (3,9 in). // Tagliate la fascia elestica in 6 pezzi, ognuno di 10 cm.

8)
Pin the first band to the top sides leaving about 4 cm (1,5 in) off. You have to pin this first band about 15 cm (5,9 in) under fold of the strap, I suggest to wear the top to choose the perfect point so that your arm can easily pass through . Then repeat with the other side. // Fissate le fasce ai lati del top lasciando fuori circa 4 cm. Dovete fissarlo circa 15 cm sotto la piega della spallina, vi consiglio di indossarlo così da trovare la misura perfetta per far sì che il vostro braccio ci passi facilmente.
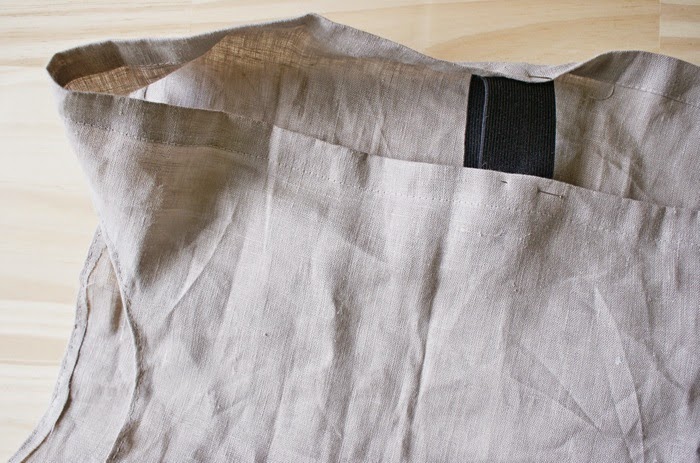
9)
Add 2 other bands under the first ones, leaving about 4 cm (1,5 in) between them. // Aggiungete altre due fasce sotto le prime, lasciando circa 4 cm di spazio tra loro.

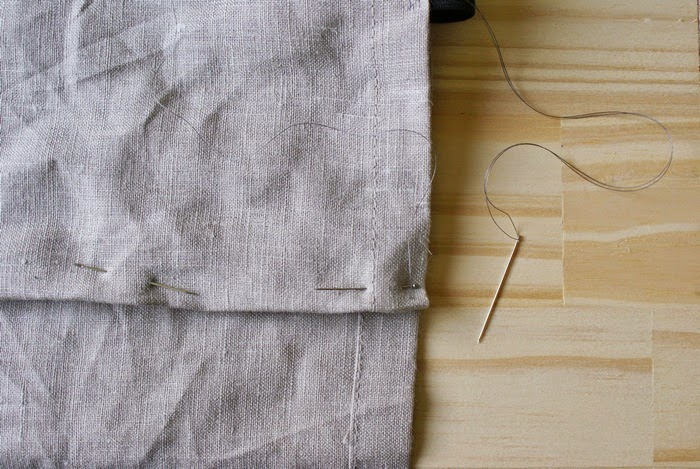
10)
Sew the bands to the fabric. // Cucite le fasce al tessuto.
11)
Cut the top front side of the desired length (I opted for a navel-crop top length but you can also leave the fabric as long as it is or choose a super short version!). // Tagliate la parte anteriore del top della misura desiderata (io ho optato per un crop top ad altezza ombelico, ma voi potete anche lasciare il tessuto lungo com’è o scegliere una versione ancora più corta!).
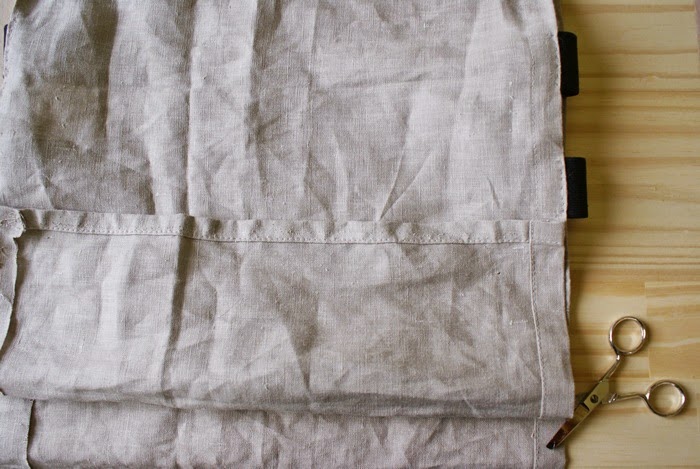
12)
Pin the hem and sew it. // Fissate l’orlo con degli spilli e cucitelo.
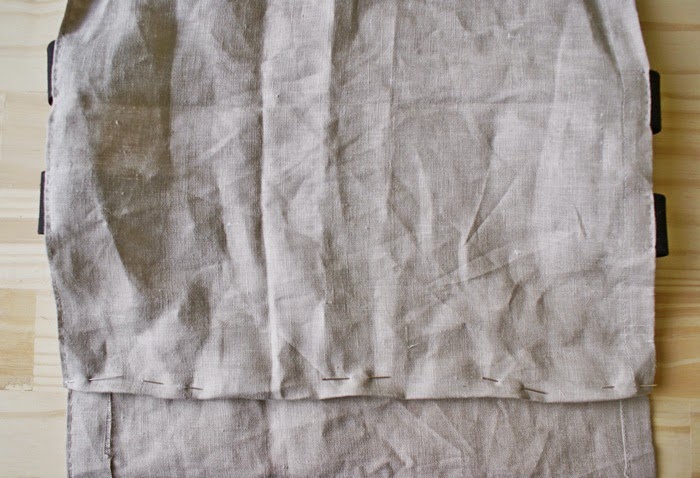
13)
Pin the third bands to top’s sides, always leaving 4 cm (1,5 in) from the others, then sew them. // Fissate le ultime fasce ai lati del top, sempre lasciando 4 cm dalle altre, poi cucitele.

14)
Voilà, your top is done! // Voilà, il vostro top è finito!
")
")
")
Easy, not? Honestly, I can’t wait for warmer days to wear it (and YES, I need a bit of tan)! Have a nice Sunday! //Facile, no? Onestamente, io non vedo l’ora che arrivino giornate più calde per indossarlo (e Sì, ho bisogno di un po’ di abbronzatura)! Buona Domenica!


