")
Sorry for this long absence, I had so busy and intensive days lately.
Next week a friend of mine is getting married and we spent a lot of time between wedding commitments and girls moments.
//
Scusate per la lunga assenza, ho avuto giornate impegnate e intense, ultimamente.
Una mia amica si sposa la prossima settimana e abbiamo passato molto tempo fra impegni da matrimonio e momenti tra ragazze.
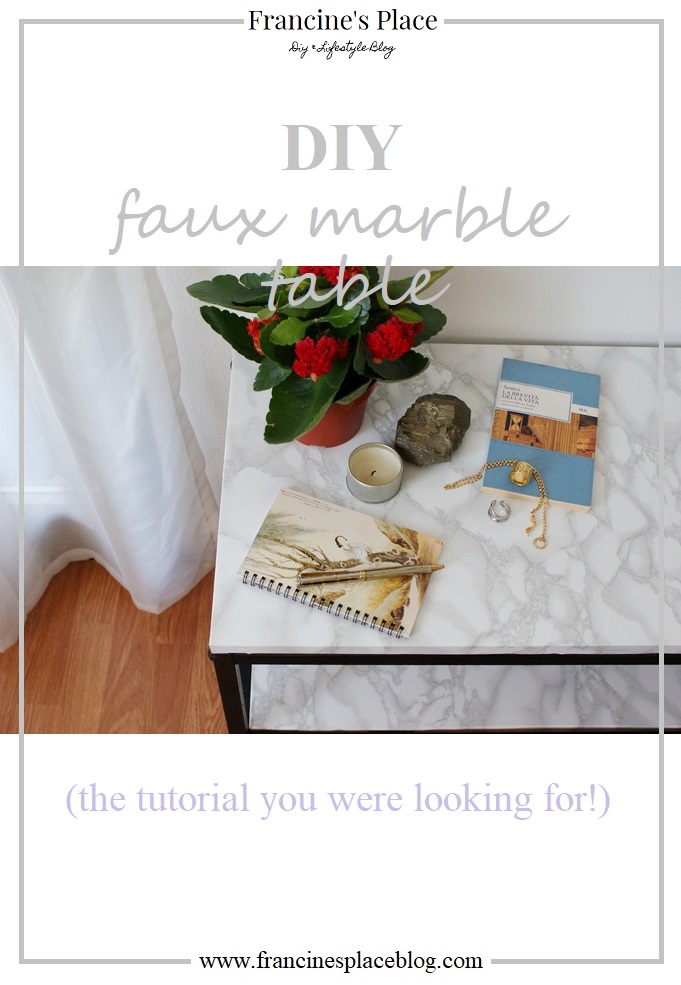
I will talk about it in the future, but now let’s see how you can do the marble table you’ve always drooled for (yes, everyone wants a marble table in his life) in few minutes and with a minimal cost. Yes, because you only need an old table and some marble paper (if you made these marble coasters, you’ll definitely have some paper apart!). Okay, it is actually more a restyling than a DIY, but hey, no rules in the crafty world!
//
Ve ne parlerò in futuro, per ora vediamo come fare il tavolo di marmo per il quale avete sempre sbavato (sì, chiunque vuole un tavolo di marmo) in pochi minuti e con un costo contenuto. Eh già, perché vi serve solo un vecchio tavolo e della carta marmorizzata (se avete fatto questi sottobicchieri sicuramente ne avrete un po’ da parte!). Okay, è più un restyling di un fai da te, ma ehi, niente regole nel mondo crafty!
***
You need // Vi occorre:
As I told you, you only need and old table, adhesive marble paper and scissors, pencil and ruler to take measures. // Come vi ho detto, vi serve solo un tavolo, carta adesiva marmorizzata e forbici, matita e righello per prendere le misure.
")
")
How to // Come procedere:
1)
Measure length and width of the table surface and cut a piece of paper adding 1 cm (0,39 in) for each side (measure changes depending on the heigth of the surface). // Misurate lunghezza e larghezza del piano del tavolo e tagliate la carta abbondando di 1 cm per ogni lato (la misura cambia in base allo spessore del piano).
")
")
")
2)
Now detach one of the shortest sides of the paper and attach it to the table, always leaving 1 cm (0,39 in), that will cover the heigth. // Ora staccate uno dei lati corti della carta ed attaccatelo al tavolo, sempre lasciando 1 cm che servirà a coprire lo spessore.
")
")
3)
Continue to unroll the paper attaching it to the table. The ruler will help you to attach it without leaving air bubbles! // Continuate a srotolare la carta e ad attaccarla al tavolo. Il righello vi aiuterà ad attaccare senza lasciare bolle d’aria!
")
4)
Now fold the paper and attach it to the heigth. For the corners you’ll only need to cut each corner in half and fold the two points one over the other. // Ora piegate la carta ed attaccatela allo spessore del piano. Per gli angoli, vi basterà semplicemente tagliarli a metà e piegare le due punte una copra l’altra.
")
")
")
")
5)
Voilà! It’s quicker than it seems, really! When my boyfriend saw the final result, it liked it so much that he said <<Let’s add an other shelf>>; so we bought a piece of wood and I covered it too. The old, sad, flat table is now so beautiful and a favourite piece in our livingroom. And you know that, when bf approves, it is the winning project. // Voilà! Credetemi, è più veloce di quanto non sembri! Quando il mio ragazzo ha visto il risultato finale gli è piaciuto così tanto da dire: <<Aggiungiamo un altro ripiano>>; così abbiamo comprato del legno e l’ho ricoperto. Il vecchio, triste, anonimo tavolino è ora bello e spicca nel nostro salotto. E voi sapete bene che, quando il fidanzato approva, il progetto è davvero vincente.
")
")
")
Happy weekend! // Buon weekend!
Did you like the post? Pin it n Pinterest! // Piaciuto il post? Condividetelo su Pinterest!