")
Hi everyone! I am sorry for this lack of posting, I was so busy and couldn’t find time to share new
projects and creations.
Today I am here to show you a new funny diy!
//
Ciao a tutti! Mi spiace per non aver postato nulla ultimamente, ma sono stata molto occupata e non ho trovato il tempo di condividere nuovi progetti e creazioni.
Oggi sono qui per mostrarvi un nuovo, divertente, fai-da-te!
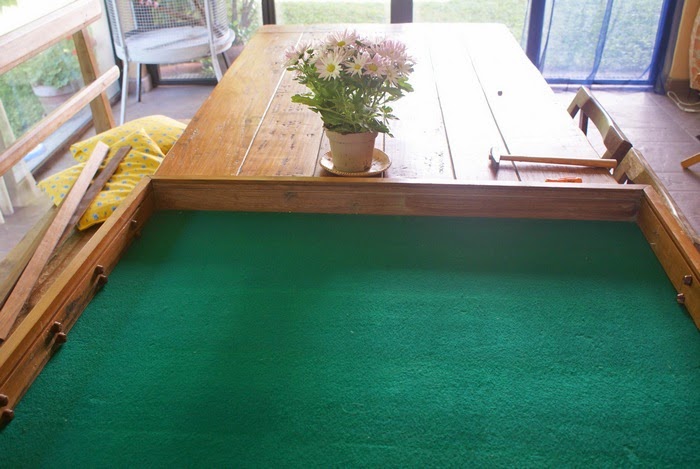
It was my mum’s idea: she bought an old wooden display cabinet in a vintage market and would give to my dad for his birthday, so we decided to refresh its look with marbled paper and we are really proud of
the result. My dad appreciated it so much, I am curious to know if you think the same!
//
L’idea è stata di mia mamma: ha acquistato una vecchia bacheca di legno in un mercatino dell’antiquariato e ha deciso di regalarla a mio padre in occasione del suo compleanno. Abbiamo scelto della carta marmorizzata per darle un look un po’ più “fresco” e siamo molto contente del risultato. A mio papà è piaciuta molto, sono proprio curiosa di vedere se anche voi pensate lo stesso!
***
You need // Vi occorre:
- An old display cabinet, big or small, dimension is not important. // Una vecchia bacheca, non
importa se grande o piccola. - Marbled adesive paper. // Carta adesiva marmorizzata.
- Hummer and pliers. // Martello e pinze.
- Ruler. // Righello.
- Meter. // Metro.
- Scissors and cutter. // Forbici e taglierino.

How to // Come procedere:
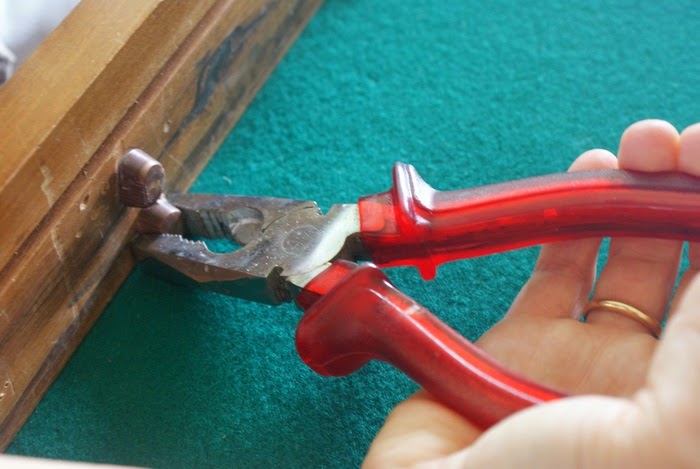
1)
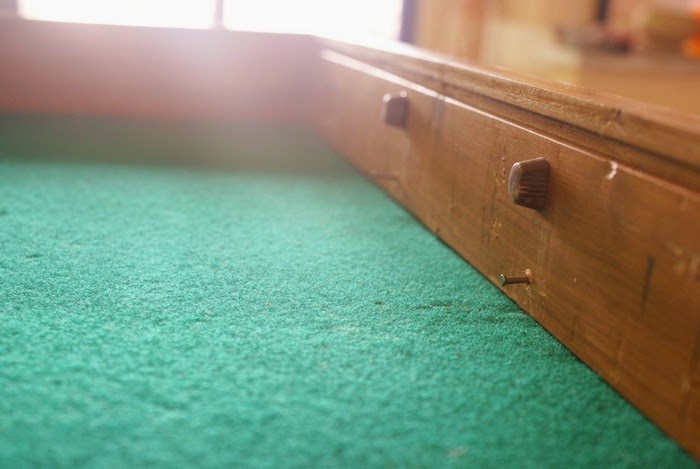
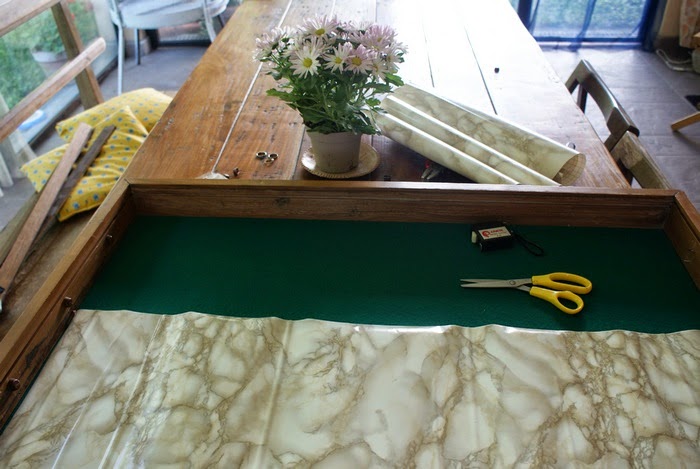
First, we disassembled the shelves and the glass shutters and removed nails’ cover with pliers. // Prima di tutto, abbiamo smontato gli scaffali e le antine di vetro e rimosso i copri-chiodi con le pinze.
2)
Then we measured height and width of the bottom. // Poi abbiamo misurato l’interno della bacheca, altezza e lunghezza del fondo.

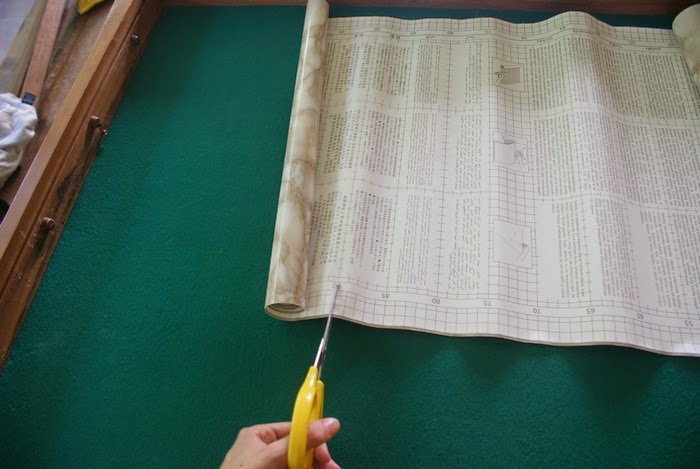
3)
We cut the marbled paper abounding with about 1-2 mm for each side. // Abbiamo tagliato la carta marmorizzata abbondando di circa uno o due millimetri per ogni lato.
4)
We placed the adesive paper on the bottom of the display cabinet. Helping us with the ruler and starting from one side, we made it adhere to the board, unrolling it slowly and pressing with the ruler to remove possible air bubbles. This passage is a bit difficult, but if you can have the help of someone, it will take you just few minutes (our display cabinet was so big, with a smaller one it will be less
laborious!). // Abbiamo posizionato la carta adesiva sul fondo della bacheca. Con l’aiuto del righello e partendo da un lato, abbiamo cominciato a farla aderire al piano, srotolando man mano la
restante e pressando bene con il righello per togliere eventuali bolle d’aria. Questa è l’unica operazione un po’ complicata, ma se vi farete aiutare vi ruberà solo qualche minuto (la nostra bacheca, poi, era molto grande; con una piccola avrete sicuramente meno difficoltà!).


5)
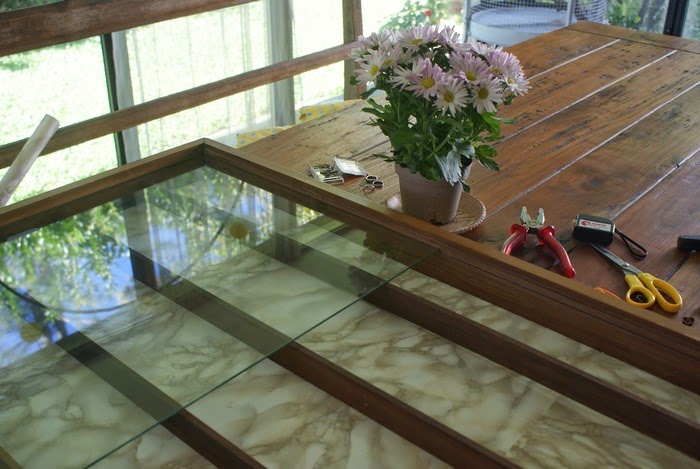
We re-assembled the shelves and glass shutters. // Abbiamo rimontato i ripiani e le antine di vetro.


6)
Finally, we’ve filled it up! // Infine l’abbiamo riempita a piacere!
")
Did you like this project? Let me know with a comment below! See you soon! // Vi è piaciuto questo progetto? Fatemelo sapere con un commento qui sotto! A presto!


